Add the Relevance Module to a Project
Info: The Relevance Module requires a standard or premium Bloomreach Content license. Contact Bloomreach for licensing details.
Overview
This guide explains how to add the Relevance Module to a Bloomreach Content project. It covers installation using Essentials and manual configuration steps, including setting up data stores in a local Cargo-based development environment. After completing these steps, the CMS application will include the Content audiences application.
Installation Using Essentials
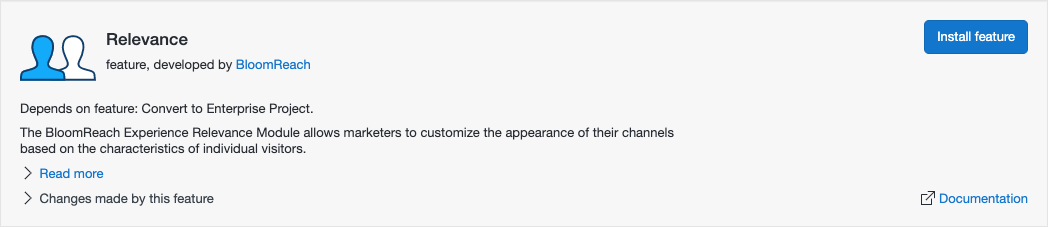
You can install the Relevance Module through Essentials. When starting a new project, select Make use of Enterprise features. Then, go to the Library tab in Essentials, find the Relevance feature, and click Install feature. Essentials applies most of the manual installation steps described below.
To collect visitor location data, add a GeoIP database.
Rebuild and restart your project.
To enable the visitor location map in the Audiences tab of the Relevance module, configure the Google API key.
The Essentials Relevance feature bootstraps the relevance system user into the webmaster group. This only takes effect when initializing a new repository. For existing repositories, use one of these workarounds:
- For new projects created with the archetype, delete the local
storagefolder before restarting your project after adding the Relevance feature. - For all other cases, including redeployments in existing environments, manually add the Relevance system user to the webmaster group.
Manual Installation Instructions
Start with a Bloomreach Content project created from the Maven archetype, as described in Set up a Bloomreach Content Project. The top-level pom.xml must use hippo-cms7-enterprise-release as its parent.
Add Dependency to Top-level POM
In the top-level pom.xml, add:
<dependencies> <dependency> <groupId>com.onehippo.cms7</groupId> <artifactId>hippo-addon-targeting-shared-api</artifactId> <scope>provided</scope> </dependency> </dependencies>
Do not place this dependency inside <dependencyManagement>.
In the cargo.run profile, add hippo-addon-targeting-shared-api as a shared library:
<profile> <id>cargo.run</id> <build> <plugins> <plugin> <groupId>org.codehaus.cargo</groupId> <artifactId>cargo-maven3-plugin</artifactId> <configuration> <!-- snip --/> <container> <!-- snip --/> <dependencies> <dependency> <groupId>com.onehippo.cms7</groupId> <artifactId>hippo-addon-targeting-shared-api</artifactId> <classpath>shared</classpath> </dependency> </dependencies> </container> </configuration> </plugin>
Add these properties to the cargo.run profile's <properties> element:
<properties> <targeting.bootstrap>false</targeting.bootstrap> <sql.url>jdbc:h2:${repo.path}/targeting/targeting;AUTO_SERVER=TRUE</sql.url> <sql.driver>org.h2.Driver</sql.driver> <targeting.truncate>true</targeting.truncate> <sql.username>sa</sql.username> </properties>
Add Dependency to CMS Dependencies POM
In cms-dependencies/pom.xml, add:
<dependency> <groupId>com.onehippo.cms7</groupId> <artifactId>hippo-addon-targeting-cms-dependencies</artifactId> <type>pom</type> </dependency>
Add Dependency to Site Components POM
In site/components/pom.xml, add:
<dependency> <groupId>com.onehippo.cms7</groupId> <artifactId>hippo-addon-targeting-site-dependencies</artifactId> <type>pom</type> </dependency>
Configure an H2 Database JNDI Data Source
In your local Cargo-based development environment, configure a JNDI data source for requests, visitors, and statistics data using the embedded H2 SQL Database.
Add the following JNDI data source configuration to conf/context.xml:
<Resource name="jdbc/targetingDS" auth="Container" type="javax.sql.DataSource" maxTotal="100" maxIdle="10" initialSize="10" maxWaitMillis="10000" testWhileIdle="true" testOnBorrow="false" validationQuery="SELECT 1" timeBetweenEvictionRunsMillis="10000" minEvictableIdleTimeMillis="60000" username="sa" password="" driverClassName="org.h2.Driver" url="jdbc:h2:${repo.path}/targeting/targeting"/>
By default, the requests, visitors, and statistics data stores use the jdbc/targetingDS data source.
Add Logger to log4j2-dev.xml and log4j2-dist.xml
Add the following logger to both conf/log4j2-dev.xml and conf/log4j2-dist.xml:
<Logger name="com.onehippo.cms7.targeting" level="warn"/>
Include the Targeting API in Shared Lib for Distribution
In myproject/src/main/assembly/shared-lib-component.xml, add:
<include>com.onehippo.cms7:hippo-addon-targeting-shared-api</include>
Disable Elasticsearch Support in HST Config Properties
Hint: Skip this step if you plan to add Trends and Experiments.
If you do not plan to use Trends and Experiments, disable Elasticsearch support in cms/src/main/webapp/WEB-INF/hst-config.properties:
targeting.elastic.disabled = true
Add GeoIP Database
To enable visitor geolocation, follow the instructions in Add the GeoIP/GeoLite Database to a Project.
Rebuild and Restart
Stop the application if it is running. Rebuild and restart the project as described in the Get Started Trail.
Add Relevance System User to Webmasters Group
Use the Console to navigate to /hippo:configuration/hippo:groups/webmaster.
Add hippo-relevance to the multi-valued String property hipposys:members. For example:
/hippo:configuration/hippo:groups/webmaster:
  hipposys:members: [hippo-relevance, editor]
For projects already deployed before adding the Relevance Module, repeat this step in each environment after redeployment.
Configure Google API Key
To enable the map widget in the Realtime tab of the Content audiences application, configure your Google API key.
In the Console, navigate to /hippo:configuration/hippo:frontend/cms/hippo-targeting/experience-optimizer-perspective.
Add a String property google.api.key with your Google API key:
/hippo:configuration/hippo:frontend/cms/hippo-targeting/experience-optimizer-perspective:
  google.api.key = YOUR_API_KEY
Optional: Add the Collectors Bundle
The Relevance Module includes several collectors that are not bootstrapped by default. The Collectors Bundle provides commonly used collectors, characteristics, and UI plugins as a jar file. For details, see Add the Collectors Bundle to a Project.
Optional: Add Experiments and Trends
The Relevance Experiments and Trends features are optional and require Elasticsearch. For setup instructions, see Add Relevance Experiments and Trends to a Project.
Run in Docker
To enable Relevance support in Docker environments, follow these steps.
Add the following resource/environment configuration to context-mysql.xml or context-postgres.xml:
<Resource
name="jdbc/targetingDS" auth="Container" type="javax.sql.DataSource"
maxTotal="100" maxIdle="10" initialSize="10" maxWaitMillis="10000"
testWhileIdle="true" testOnBorrow="false" validationQuery="SELECT 1"
timeBetweenEvictionRunsMillis="10000"
minEvictableIdleTimeMillis="60000"
username="@mysql.username@" password="@mysql.password@"
driverClassName="@mysql.driver@"
url="jdbc:mysql://@mysql.host@:@mysql.port@/targeting?characterEncoding=utf8&useSSL=false&allowPublicKeyRetrieval=true"/>
Create or update an init.sql file in the db-bootstrap folder with the following commands:
CREATE DATABASE targeting; GRANT ALL PRIVILEGES ON targeting.* TO admin@'%';
Add Maven Shared Dependency
In the project's root pom.xml, add the following dependency to the docker.build profile:
<dependency>
   <groupId>com.onehippo.cms7</groupId>
   <artifactId>hippo-addon-targeting-shared-api</artifactId>
   <scope>provided</scope>
</dependency>
Add Logger to log4j2-docker.xml
Add the following logger to conf/log4j2-docker.xml:
<Logger name="com.onehippo.cms7.targeting" level="warn"/>