Robots.txt Plugin Configuration
Installation
You can add the Robots.txt plugin to your project using the Essentials setup application.
Prerequisites
- A Bloomreach Content project with the Essentials setup application available.
Installation Steps
- In the Essentials setup application, add the Robots.txt feature to your project.
- Rebuild and restart your project.
- Open
http://localhost:8080/site/robots.txtin your browser to verify that the robots.txt file is available.
Configuration
You configure the robots.txt file through a dedicated document in the CMS.
- Open the Content application.
- Navigate to the
administrationfolder. - Edit and publish the
robotsdocument.
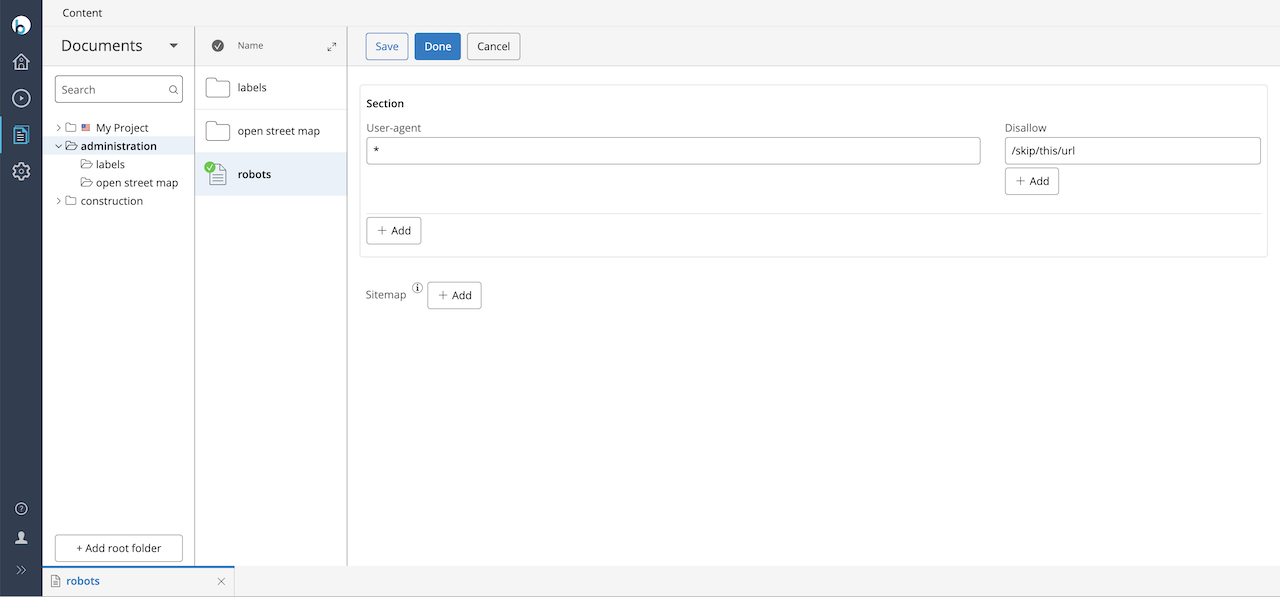
You can define multiple Sections in the robots document. Each section corresponds to a User-agent: line, followed by one or more Disallow: lines.
In the example configuration, the User-agent Googlebot is disallowed from accessing all URLs under [your.site]/abc and [your.site]/def. All User-agents are disallowed from accessing URLs under [your.site]/skip/this/url.
By default, the plugin automatically disallows all faceted navigation URLs. To change this behavior, set the Boolean property robotstxt:disallowfacnav to false on the Robots.txt configuration document using the CMS Console.
Default Delivery Tier Configuration
The setup application adds the required delivery tier configuration. This configuration works for most projects. You can modify it to fit your specific requirements.
The following component configuration and Freemarker template are added to the hst:default configuration:
/hst:hst/hst:configurations/hst:default/hst:pages/robotstxt: jcr:primaryType: hst:component hst:componentclassname: org.onehippo.forge.robotstxt.components.RobotstxtComponent hst:template: robotstxt.ftl
/hst:hst/hst:configurations/hst:default/hst:templates/robotstxt.ftl: jcr:primaryType: hst:template hst:script: (freemarker template source code)
A sitemap item is added to your project's configuration (for example, myproject):
/hst:hst/hst:configurations/myproject/hst:sitemap/robots.txt: jcr:primaryType: hst:sitemapitem hst:componentconfigurationid: hst:pages/robotstxt hst:relativecontentpath: ../administration/robots
Configure Different Robots.txt Per Mount
Info: Available since version 14.2.1.
To serve a different robots.txt file for each mount, set the robotstxt:path property to the path of the robots.txt document relative to the mount's content root. For example:
/hst:myproject/hst:hosts/staging/com/example/staging/hst:root: jcr:primaryType: hst:mount hst:homepage: root hst:mountpoint: /hst:myproject/hst:sites/myproject robotstxt:path: ../administration/robots-noindex
Example
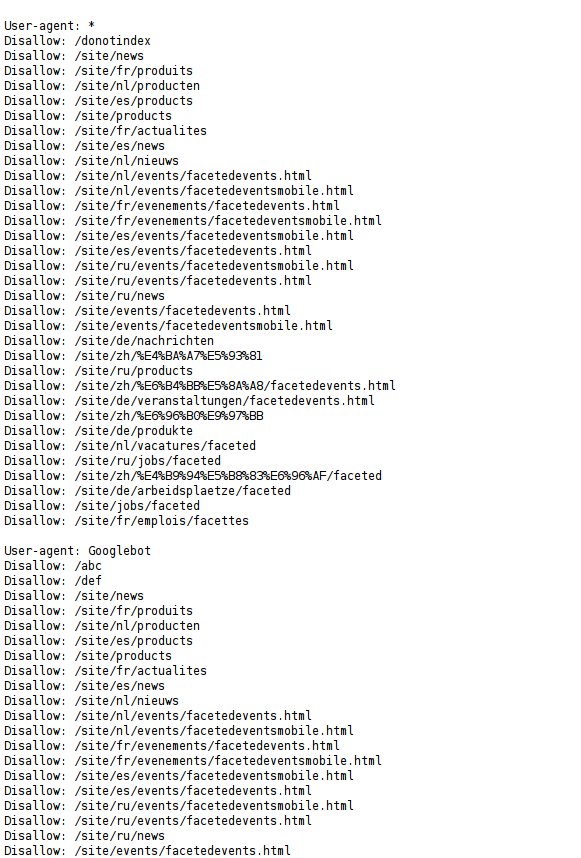
The screenshot below shows sample output for the Hippo demo website. This example includes several faceted navigation links, which appear after the section-specific paths for each section.