How to Create a Resource Bundle Document
Overview
This guide describes how to create a Resource Bundle Document in Bloomreach Content using the Content application. Resource Bundles store localization data for multiple locales and are managed centrally.
When to Use
Create a Resource Bundle Document when you need to provide localized resources (such as labels or messages) for use across your project.
Prerequisites
- Access to the Content application in Bloomreach Content
- Folder permissions to create documents
Steps
1. Select the Target Folder
Navigate to a folder that supports resource bundles in the Content application.
Because Resource Bundles contain localization data for multiple locales, create them outside locale-specific folders. Use a "non-translated" folder, such as the administration folder (created by default in projects set up using the setup application).
To restrict access, consider placing Resource Bundles in a folder with limited permissions.
In the folder's action menu (visible when you hover over the folder in the Browse Area), select Add New Document.
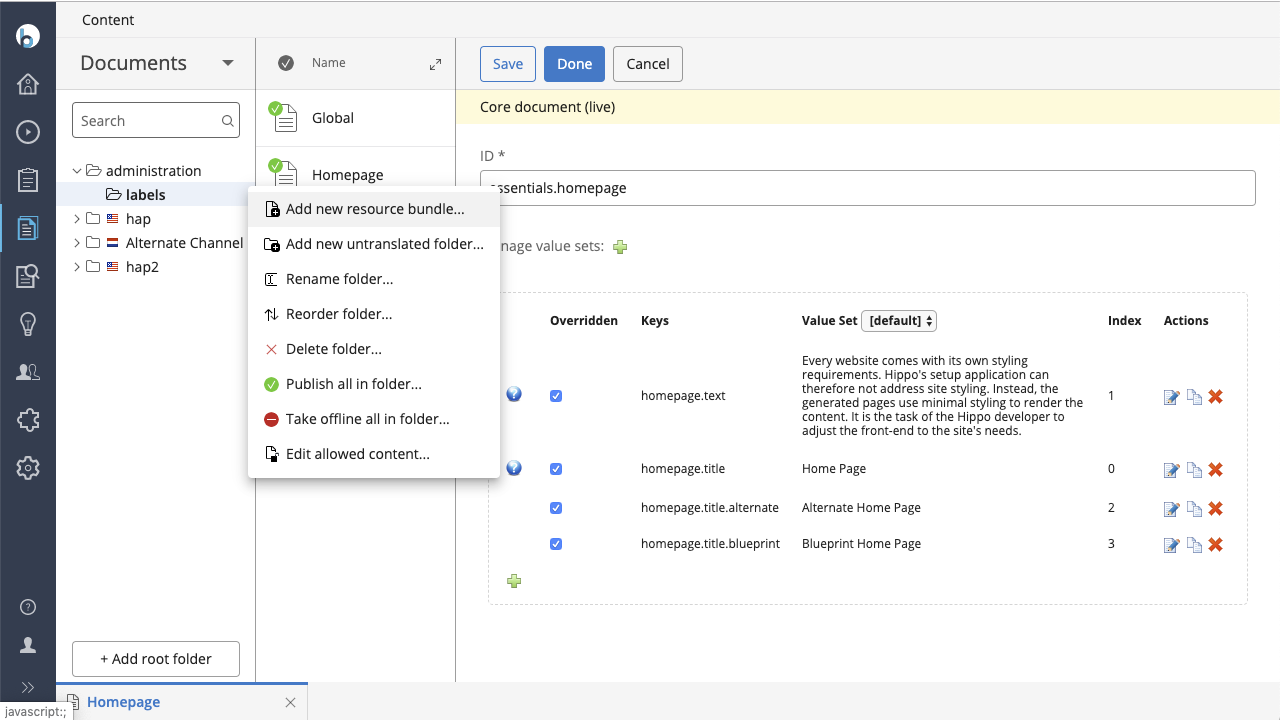
Figure 1. Select a folder in the CMS and create a document.
2. Create the Resource Bundle Document
In the dialog that appears, enter a name for the document and select Resource Bundle as the document type.
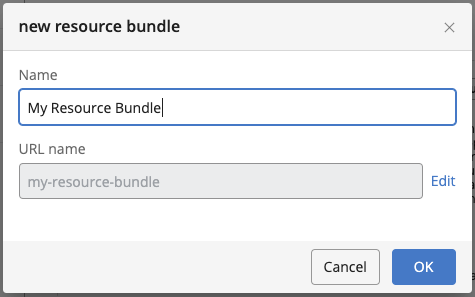
Figure 2. Specify a name, and select 'ResourceBundle' as document type.
3. Assign a Unique ID
In the Document Viewer Area, specify a unique ID for the Resource Bundle.
Use the standard Java Reverse Domain Name notation, for example:
org.onehippo.hst.demo.resources.ProductResources
The interface also displays two green "+" buttons: one to add a Value Set (locale), and one to add a new key-value set.
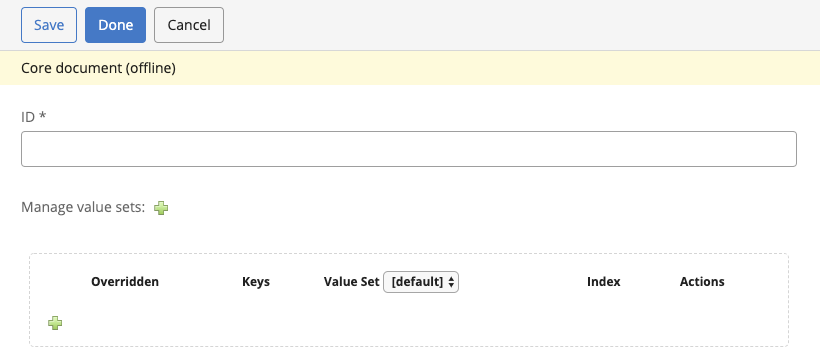
Figure 3. HST Resource Editor Plugin interface in Editing Mode.
4. Add Value Sets
A value set represents all values for a specific locale in the Resource Bundle.
To add a value set:
- Click the green "+" button near Manage Value Sets.
- In the Value Set Add Dialog, enter the locale name.
Use valid locale identifiers, such asnl(Dutch) oren_US(American English).
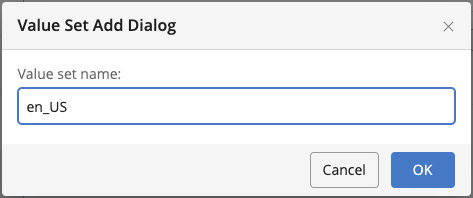
Figure 4. Dialog panel for adding Value Sets.
5. Add Resources
A resource consists of a key, one or more values (one per value set), and a description.
To add a resource:
- Click the green "+" button in the lower part of the Document Viewer Area.
- In the Resource Add Dialog, enter the required information.
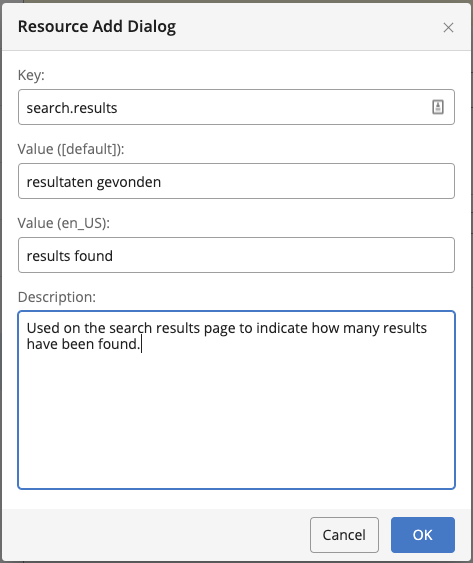
Figure 5. Dialog window to create and update a resource.
| Field | Description |
|---|---|
| Key | The key used to retrieve a localized resource from the Resource Bundle Document. It must be unique within the Resource Bundle. The UI sorts resources alphabetically by key. Using reverse domain name notation (e.g., search.results, search.box.placeholder) helps group related keys. |
| Value ([default]) | The value used if no locale is specified or if the requested locale is not present. Use the most common language for your project. |
| Value ( | For each value set, enter the value for that locale. |
| Description | Additional information about the key. This appears when hovering over the question mark icon in the Resource Bundle Document overview (see Figure 6). |
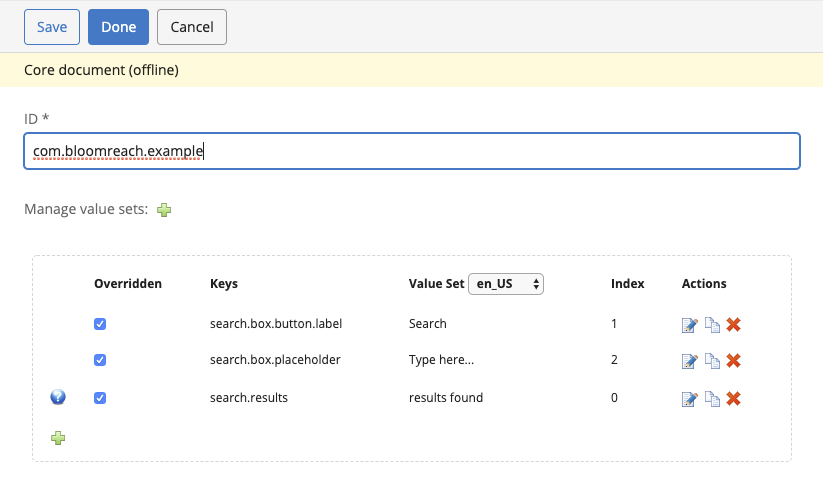
Figure 6. How the UI appears after adding resources.
6. Publish the Resource Bundle
To make the Resource Bundle Document available for use in JSPs and Java classes:
- In the header of the Document Editor Area, select Save & Close.
- After saving, select Publication → Publish.
The Resource Bundle Document is now published and available for use on the live site.
Verification
- Confirm the Resource Bundle Document appears in the selected folder.
- Verify that the document is published.
- Check that localized values are available in your application as expected.