Set Acceptance Environment
Overview
This page explains how to configure an environment as Acceptance in Bloomreach Cloud.
When to Use
Configure an Acceptance environment to run performance tests that accurately reflect production resource allocation, without using the live production environment.
Background
Performance testing on a standard Bloomreach Cloud environment does not provide results equivalent to a production environment, because production environments have more resources, such as additional running replicas. Running tests directly on production is not recommended.
By marking an environment as Acceptance, you allocate the same resources as production to that environment. Acceptance environments also have fewer restrictions than production environments:
- Users with the developer role can deploy to the acceptance environment.
- The acceptance environment can be deleted.
Note
The Acceptance environment feature is optional and requires a separate purchase.
Prerequisites
- Access to Mission Control
- At least one successfully deployed and running environment
Steps
-
Log in to Mission Control.
-
Go to the environments overview page.
-
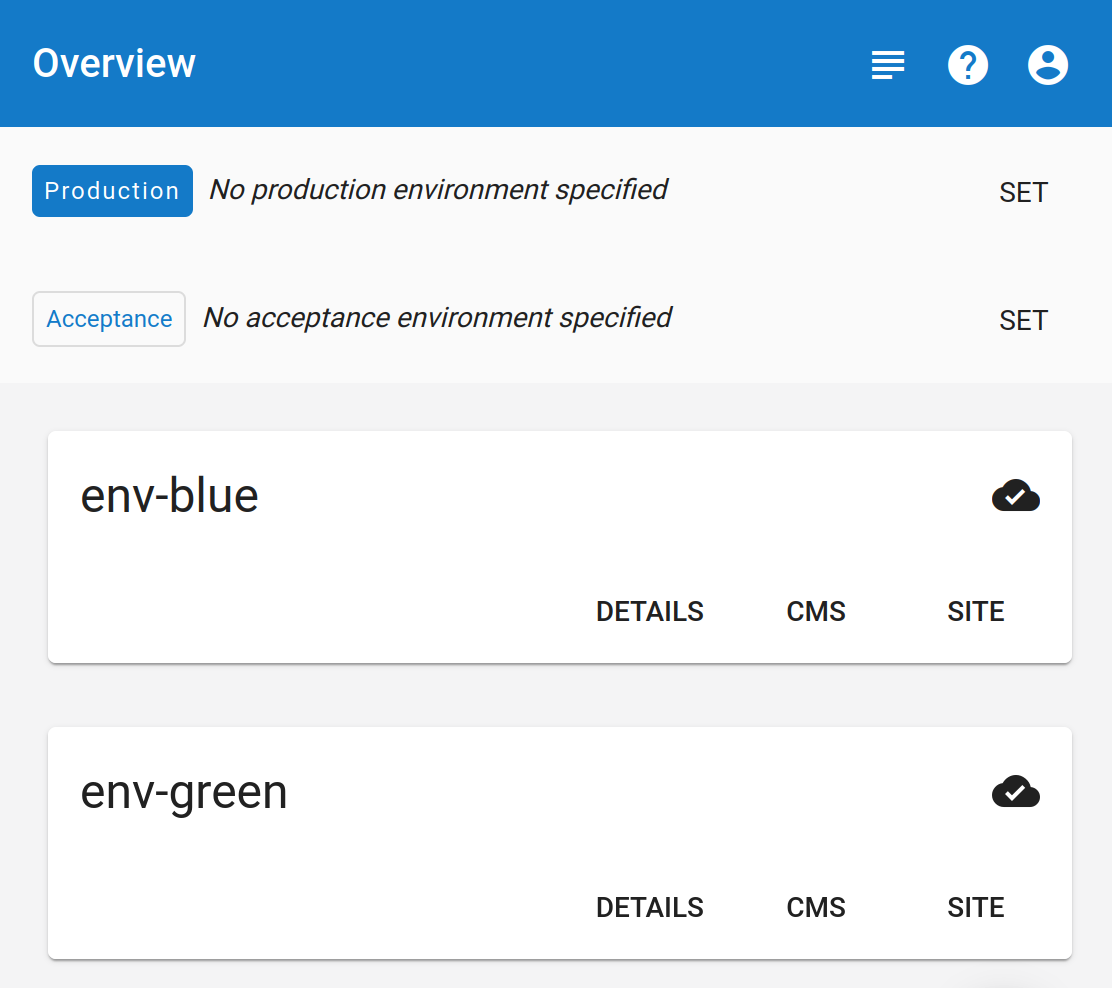
Locate the Acceptance environment switch at the top of the page.
-
Click the
SETbutton on the right. -
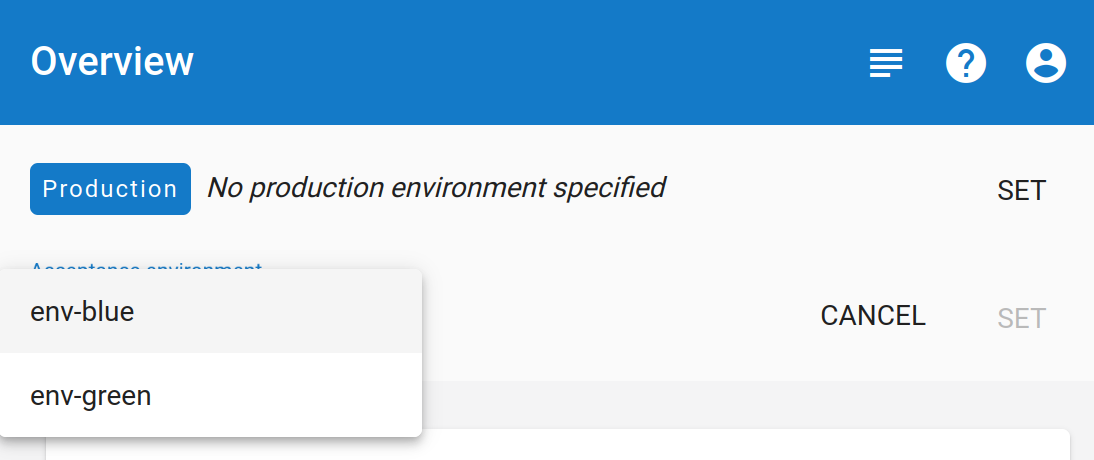
In the drop-down menu, select the environment you want to mark as Acceptance.
Verification
- The selected environment should now be marked as Acceptance in Mission Control.
- The environment will receive production-level resources.
Important Considerations
- Only one environment can be marked as Acceptance at a time. Selecting a new Acceptance environment will unmark the previous one.
- Only environments that are successfully deployed and running are eligible.
- An environment cannot be marked as both Acceptance and Production simultaneously.
API Reference
You can also set the Acceptance environment using the API. For details, see:
https://api.<stack-name>.bloomreach.cloud/v3/docs#environments-put-1