Update brXM Virtual Hosts for the bloomreach.cloud Domain
Overview
Bloomreach Cloud is changing its default domain from onehippo.io to bloomreach.cloud. This update requires you to adjust the virtual hosts configuration in the Bloomreach Experience Manager (brXM) delivery tier (HST).
Affected URLs
Only the default environment URLs are affected. For example:
https://prod-customer.onehippo.io
https://green-customer.onehippo.io
Unaffected URLs
URLs that use custom domains configured in the Mission Control Domains page are not impacted.
Prerequisites
- Access to Mission Control
- Permission to use the brXM console
- Environment stack and environment name information
Steps
Follow these steps for each environment that needs to be accessible via the bloomreach.cloud domain.
1. Open the Console
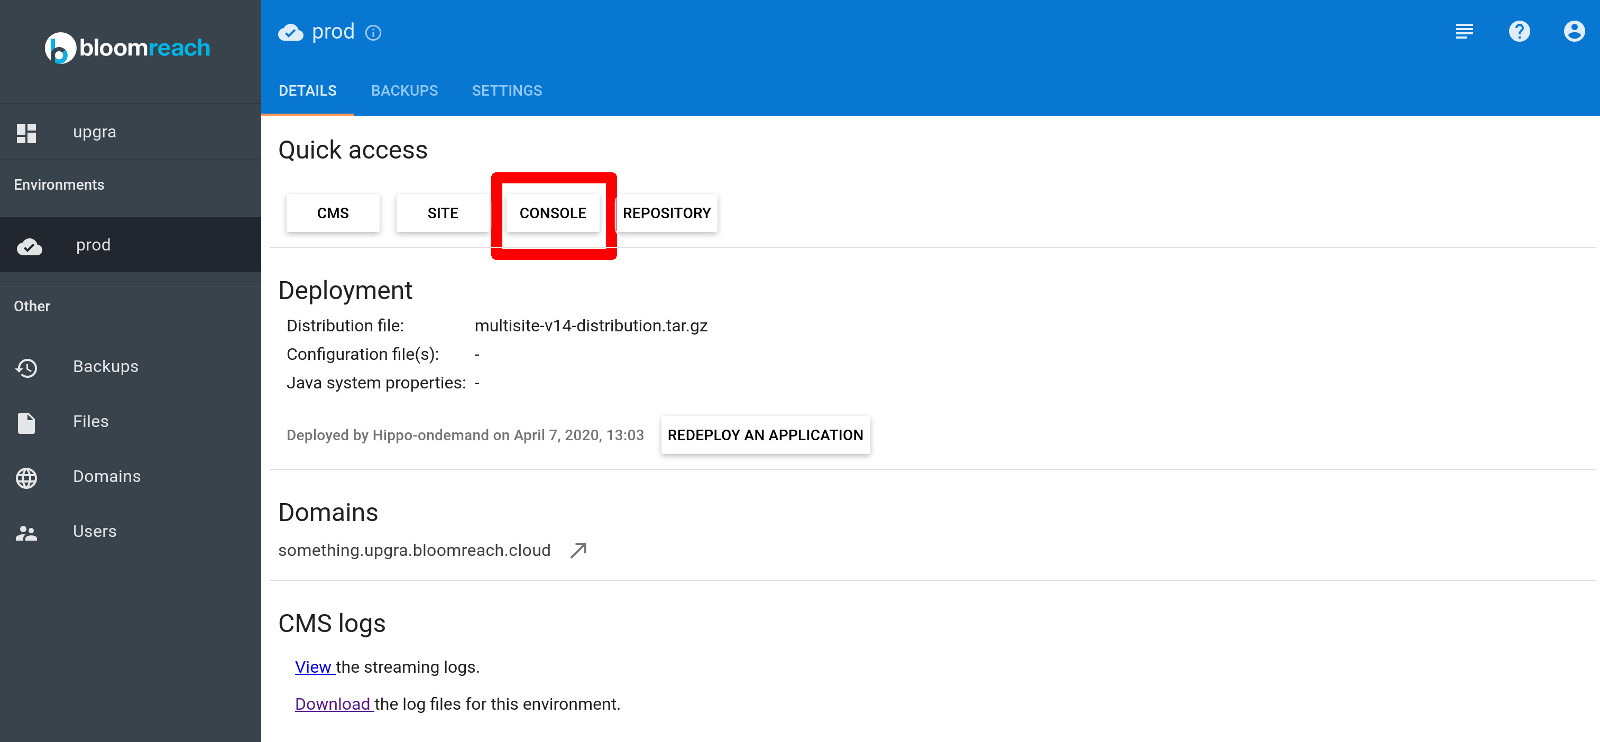
In Mission Control, open your environment and select the CONSOLE button.
2. Locate the Virtual Hosts Node
Log in to the console and navigate to:
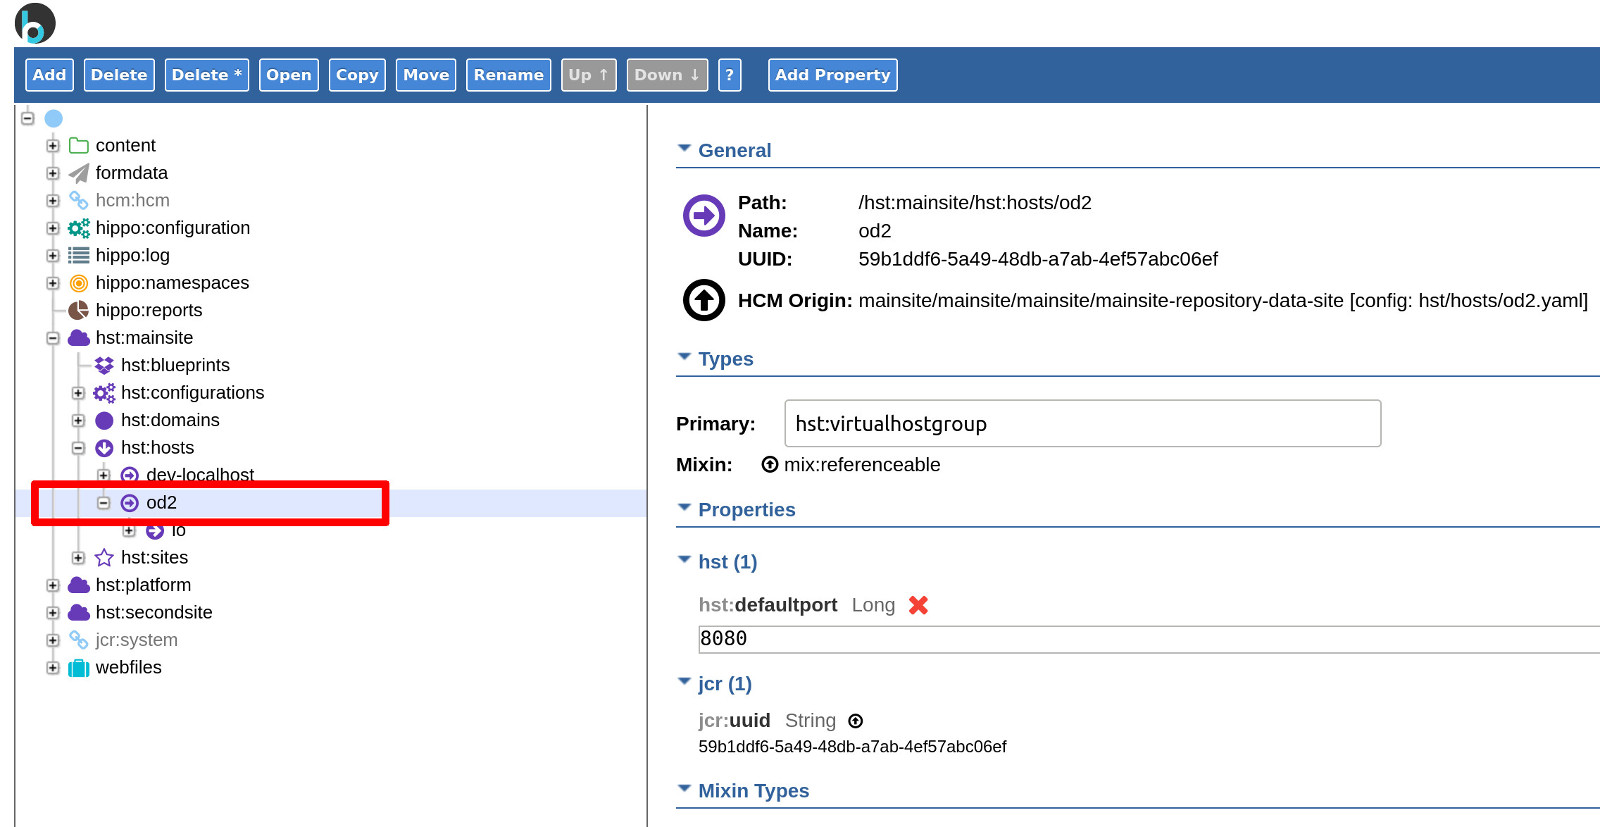
/hst:mainsite/hst:hosts/od2
This node is the root for all virtual host configurations. All changes will be made here.
3. Review the Existing Host Tree
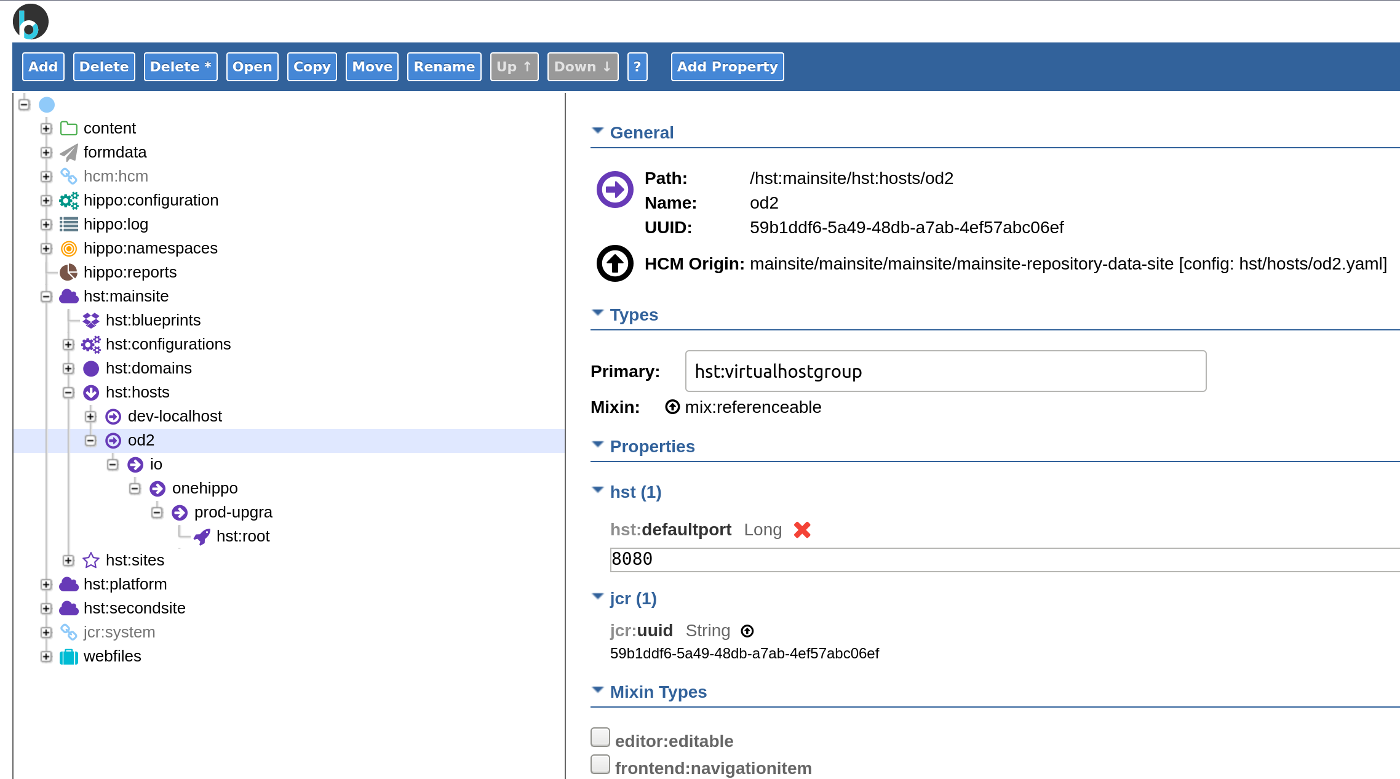
Under the od2 node, you should see at least one subtree for the onehippo.io domain. Each part of the URL is represented by a separate node.
For example, the URL https://prod-upgra.onehippo.io maps to a hierarchy of nodes.
4. Copy the 'io' Node
Right-click the io node and select Copy node.
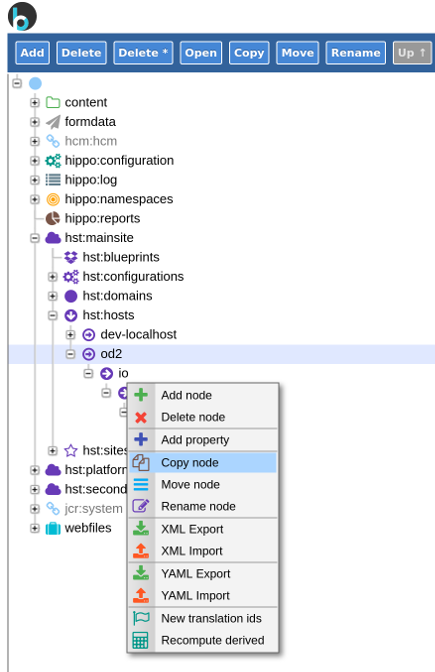
In the copy dialog, set the name to cloud.
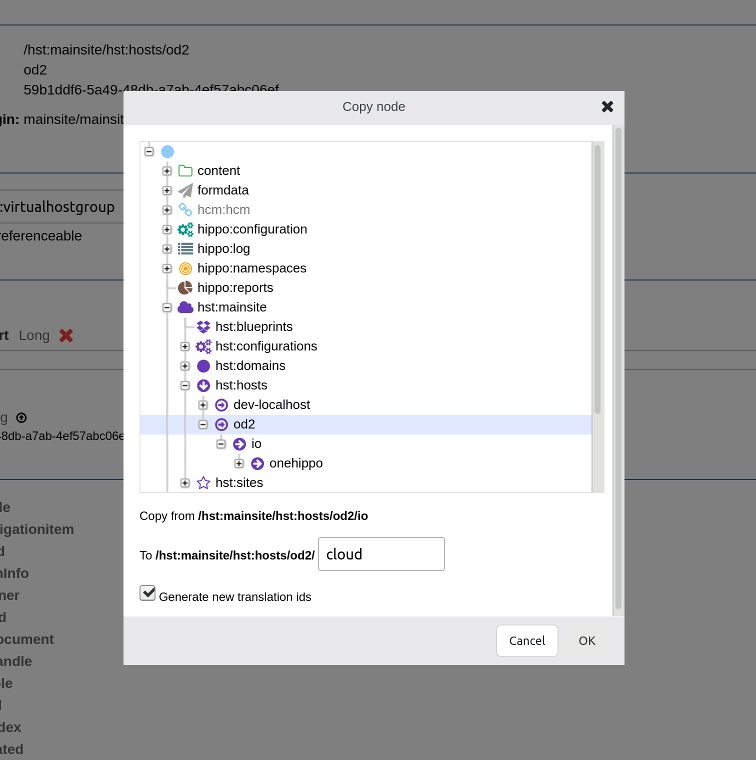
This action copies the entire io hierarchy. The result should display both cloud and io trees.
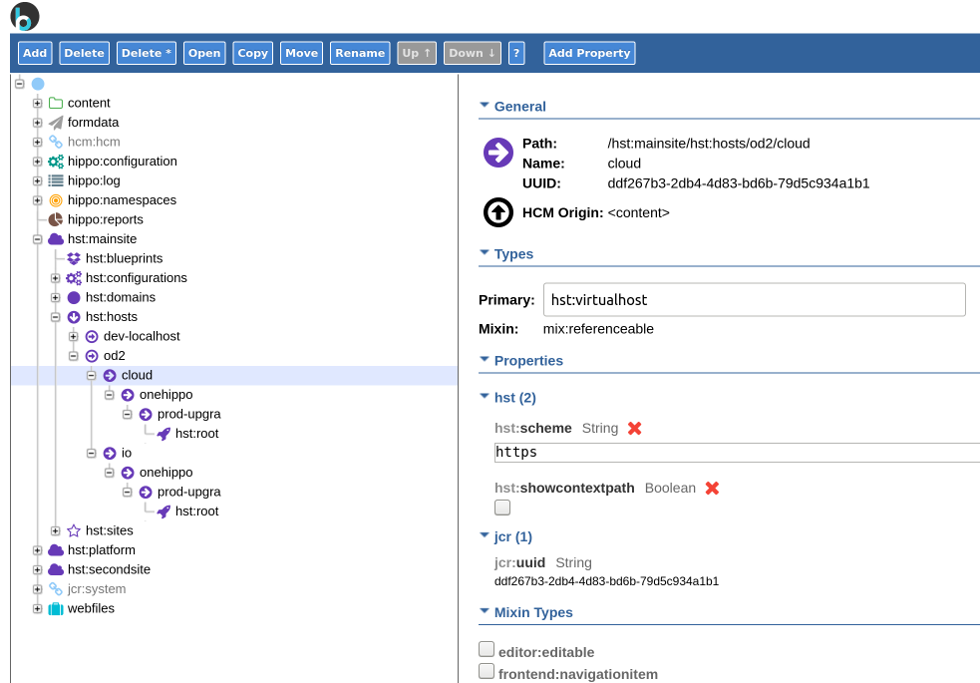
5. Rename 'onehippo' to 'bloomreach'
Right-click the onehippo node under the new cloud hierarchy. Select Rename node and enter bloomreach (without quotes).
6. Rename the Stack Node
Right-click the node representing your stack (for example, prod-upgra) and rename it to match your stack name (for example, upgra). The tree should now reflect your stack name.
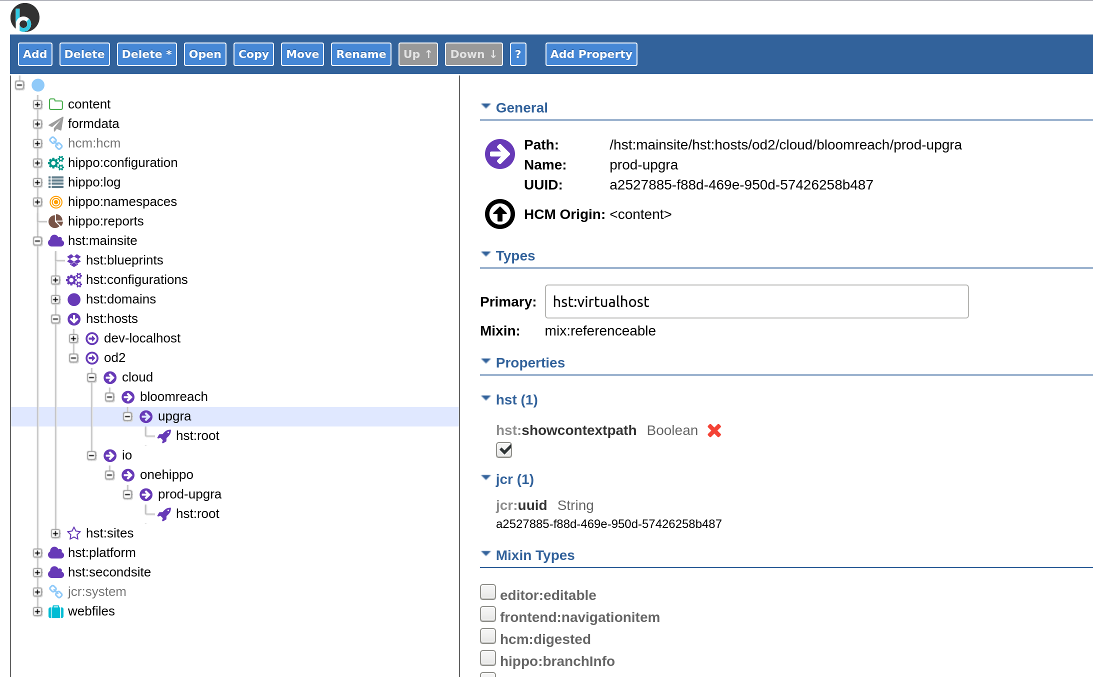
7. Add the Environment Node
The HST tree requires one node per DNS segment. For a domain like prod.upgra.bloomreach.cloud, you need four nodes: cloud, bloomreach, upgra, and prod.
Right-click the node for your stack name and select Add node.
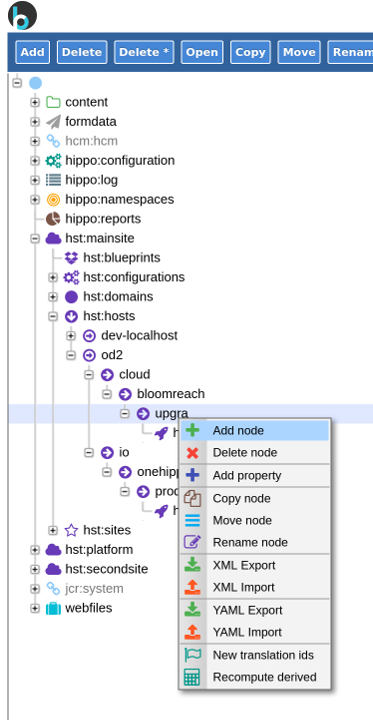
In the dialog:
- Set
Nameto your environment name (for example,prod) - Set
Primary typetohst:virtualhost
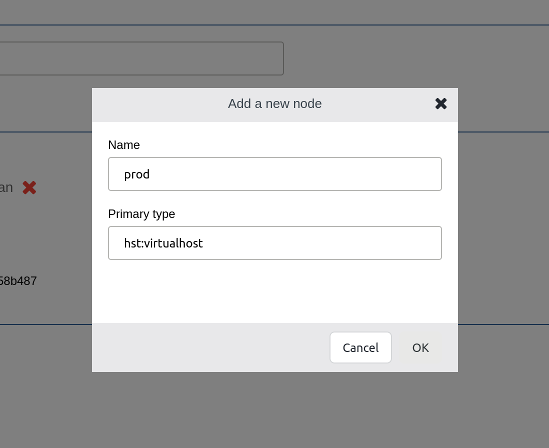
The tree should now include the new environment node.
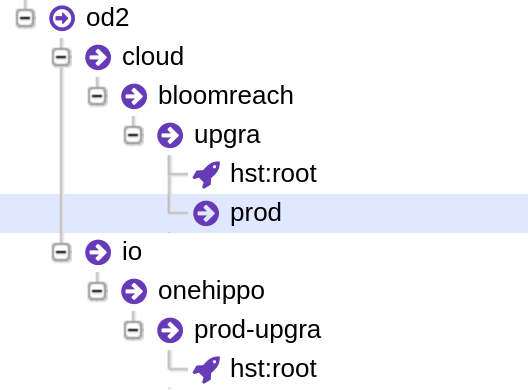
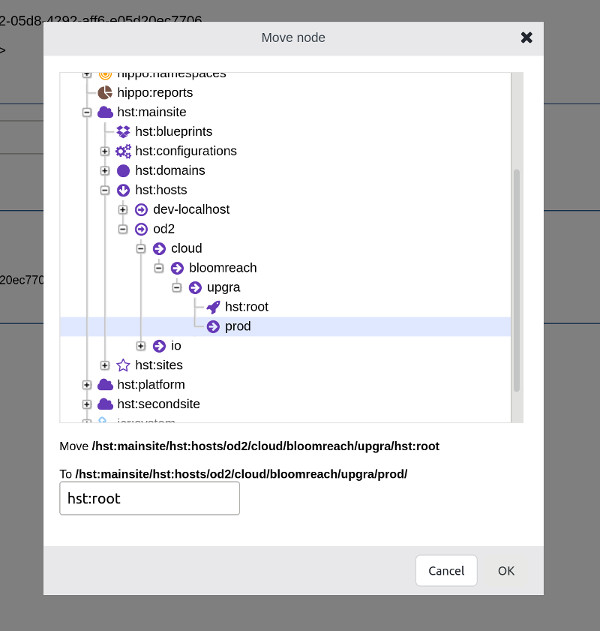
8. Move the 'hst:root' Node
Right-click the hst:root node and select Move node. Choose the newly created environment node (for example, prod) as the target.
After moving, the tree should show both the old and new environment structures.
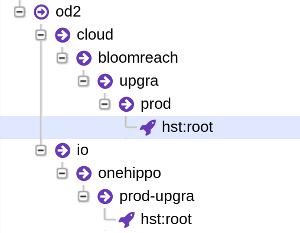
9. Save the Changes
In the top-right corner, click Write changes to repository to persist your updates.
10. Verify Access
Access your environment using the following URL pattern:
https://ENV-NAME.STACK-NAME.bloomreach.cloud/site
For example:
https://prod.upgra.bloomreach.cloud/site
You should see the site’s main page.
11. Update Experience Manager Configuration (If Needed)
If you use the Experience Manager (CMS) via a default URL (such as onehippo.io), repeat steps 1–10 under the /hst:platform/hst:hosts/od2 hierarchy.
If you access the CMS via a custom domain configured in Mission Control, no further changes are required.
Troubleshooting
- If the environment is not accessible via the new domain, verify each node in the hierarchy matches the DNS segments.
- Ensure you have saved all changes to the repository.
- Confirm that the
hst:rootnode is correctly placed under the environment node.