Install Bloomreach B2B Commerce Accelerator
Info: The Bloomreach B2B Commerce Accelerator requires a standard or premium Bloomreach Content license. Contact Bloomreach for licensing details.
Introduction
Warning: Starting with version 14.2, use the Bloomreach B2B Commerce Accelerator Maven plugin to install the B2B Commerce Accelerator application. Do not use the Boot project method described on this page. Refer to Install B2B Commerce for the current installation process.
Goal
Install the Bloomreach B2B Commerce Accelerator application using the Commerce Accelerator B2B Boot project and connect it to your commerce backend platform.
Background
The Bloomreach Commerce Accelerator B2B Boot project provides an out-of-the-box solution for integrating your commerce backend with Bloomreach Content and Bloomreach Discovery.
You can configure the Boot project with a supported commerce backend platform and Bloomreach Discovery. Currently, Salesforce B2B Commerce is the only supported B2B commerce backend. The steps below describe how to integrate with Salesforce B2B Commerce.
This page first covers setting up the Boot project in your local development environment, connecting your commerce backend, and deploying to a server environment. The second section details the Salesforce integration steps.
Set Up Local Development Environment
The Commerce Accelerator B2B Boot project is available from the Bloomreach Content Enterprise Maven repository.
- Log in at https://maven.bloomreach.com/.
- Navigate to https://maven.bloomreach.com/#browse/browse:maven2-enterprise:com%2Fbloomreach%2Fcommercedxp%2Fb2b%2Fstarterstore-b2b-boot.
- Select the required release version (X.Y.Z) and open the corresponding folder.
- Download the
starterstore-b2b-boot-X.Y.Z-project.tar.gz,.tar.bz2, or.zipsource distribution and extract it to a local folder.
Configure the connection properties for your commerce backends in the Bloomreach Accelerator Configuration File. The following example shows typical properties:
# Bloomreach Accelerator parameters for bloomreach backend service.
bloomreach.cache.enabled = true
bloomreach.account.id = 0000
bloomreach.api.base.url = http://core.dxpapi.com/api/
bloomreach.domain.key = your_brsm_instance
bloomreach.view.id =
bloomreach.widgets.auth.key =

# StarterStore parameters for SalesForce CloudCraze backend service.
salesforcecc.cache.enabled = (e.g. true or false)
salesforcecc.clientId = (e.g your Connected App consumer key)
salesforcecc.clientSecret = (e.g. your Connected App consumer secret)
salesforcecc.username = (e.g. SalesForce B2B merchant username)
salesforcecc.password =
salesforcecc.securityToken =
salesforcecc.baseUrl = (e.g. https://<your_instance>.force.com/DefaultStore)
salesforcecc.accessTokenUri = (e.g. https://<your_instance>.salesforce.com)
salesforcecc.storefront.user.signin.url = (e.g. https://<your_instance>.force.com/DefaultStore/SiteLogin?startURL=/CustomSiteLogin) salesforcecc.storefront.user.signout.url = (e.g. https://<your_instance>.force.com/DefaultStore/secur/logout.jsp)
salesforcecc.storefront.user.register.url = (e.g. https://<your_instance>.force.com/DefaultStore/UserRegister)
salesforcecc.storefront.user.changePassword.url = (e.g. https://<your_instance>.force.com/DefaultStore/ChangePassword)
salesforcecc.storefront.locale.language.code = (e.g en_US)
salesforcecc.storefront.locale.currency.ISO3code = (e.g. USD)
Build the application with Maven:
mvn clean verify
Start the application:
mvn -P cargo.run
Verify that the CMS is available at http://localhost:8080/cms/ (default credentials: admin / admin).
To confirm the commerce backend connection, open the Content application and navigate to Bloomreach Accelerator: Commerce B2B Boot Project > products. Open an example product document or create a new one, select your commerce backend under Commerce Connector, and click Browse under Related External Product. You should be able to browse products from your commerce backend.
Warning: Automated migration of existing projects to a Bloomreach B2B Commerce Accelerator project is not supported in the current version. Start with the downloaded Boot project source and apply your custom features to it. Future versions will provide improved migration tools.
Deploy in a Server Environment
The deployment process for the Commerce Accelerator B2B Boot application is the same as for any Bloomreach Content project.
Deploy in Bloomreach Cloud
For deployment in Bloomreach Cloud, follow the instructions in Deploy in Bloomreach Cloud.
As described in Configure Bloomreach Commerce Accelerator, Boot-based projects require the braccelerator.properties configuration file. Deploy the distribution with this configuration file, following Set Environment Configuration Properties, and rename the file to braccelerator.properties. Both conf/platform.xml and conf/hst.xml reference this file.
Deploy a Project Distribution in Other Environments
For environments other than Bloomreach Cloud, follow Create a Project Distribution and Deploy a Project Distribution.
Ensure that the braccelerator.properties configuration file is included in the deployment. Both conf/platform.xml and conf/hst.xml reference this file.
Install Salesforce Integration Components
Complete the following steps to integrate with Salesforce. Before starting, set up a Salesforce storefront as described in the Salesforce documentation.
Storefront Integration Components
The Commerce Accelerator integrates with the Salesforce B2B storefront. The Boot project delegates user sign-in and sign-up operations to Salesforce. The Boot project includes Visualforce Pages and Controllers in the /src/main/salesforcecc folder. You must copy or replace specific Visualforce Pages and Apex classes as described below.
Site Redirects
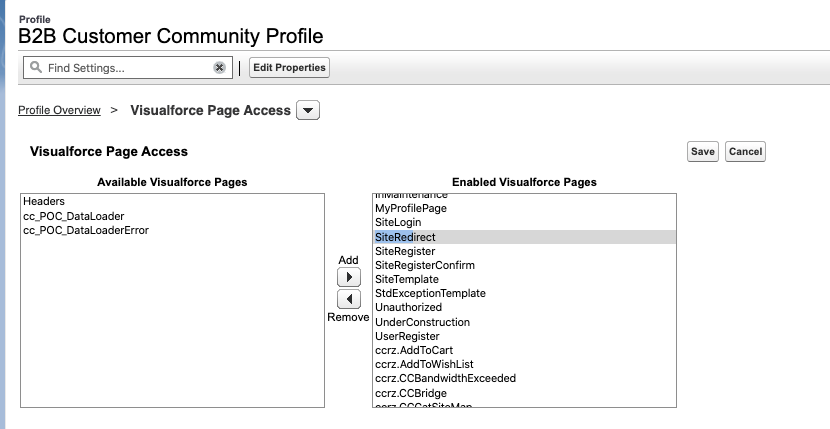
- Create a new Visualforce Page named
SiteRedirectand copy the content fromsrc/main/salesforcecc/SiteRedirect.page. - Enable the page in the Salesforce "white-list":
- In Force.com Setup, search for "Sites" in the left pane.
- Select your customer community.
- Go to Public Settings > Visualforce Page Access.
- Move
SiteRedirectfrom "Available" to "Enabled".
Delegated Registration
- Create a new Salesforce controller for user registration by copying
UserRegister.controllerfromsrc/main/salesforcecc. - Create the
UserRegisterVisualforce page by copyingsrc/main/salesforcecc/UserRegister.page. - Enable public access for the new Visualforce page as described above for
SiteRedirect. - Update the login page logic:
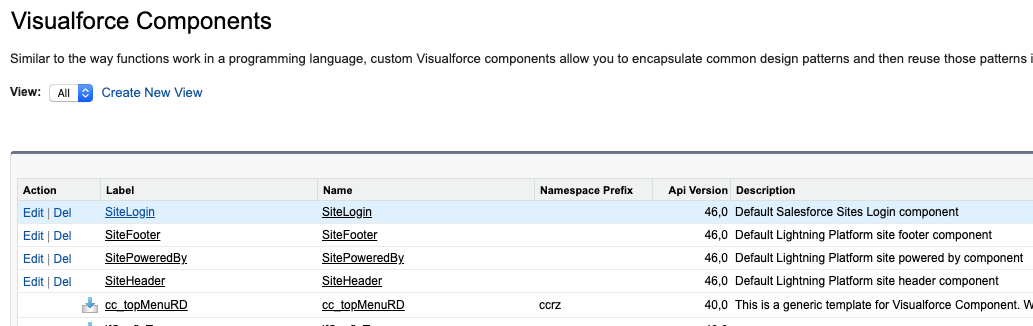
- In the Build > Develop tab, select Visualforce Component.
- Locate
SiteLoginand edit it. - Replace its content with
src/main/salesforcecc/SiteLoginComponent.page. - Save your changes.
- Set the correct redirect URL in the Bloomreach Accelerator
.propertiesfile using thesalesforcecc.storefront.user.registration.urlproperty. - Enable the
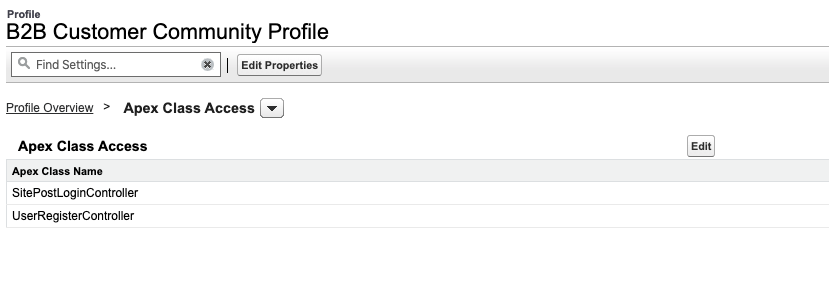
UserRegisterVisualforce page and any custom Apex classes as needed. Refer to Salesforce documentation for details.
To verify the integration, access <your_brX_instance>/login. You should be redirected to the Salesforce registration page. Register a new user and confirm that you are redirected back to the Bloomreach B2B Commerce Accelerator site.
Federated Authentication Integration
- Create a new Visualforce Controller named
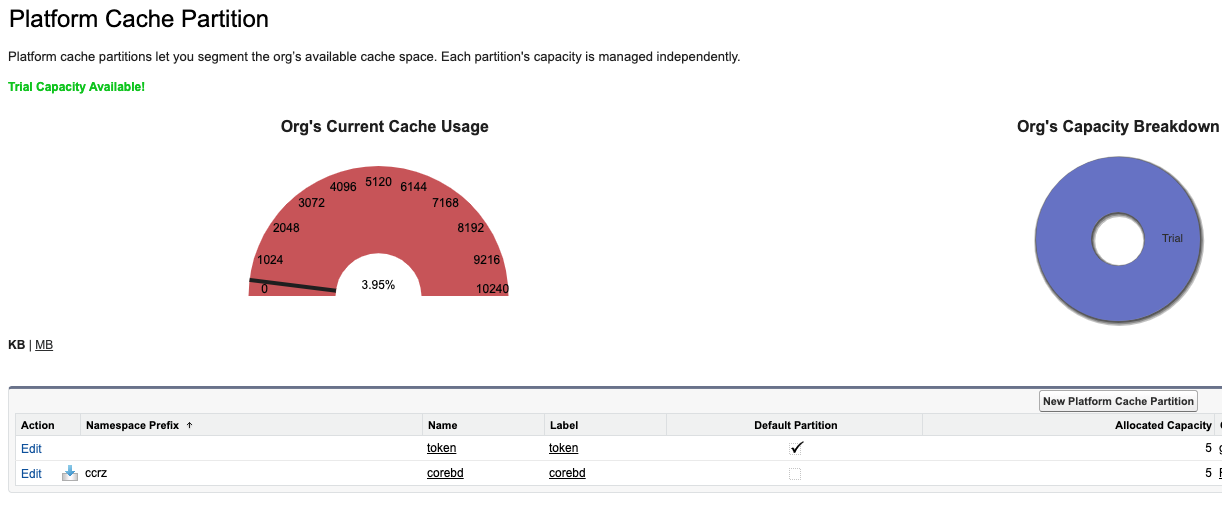
SitePostLoginControllerand copy the content fromsrc/main/salesforcecc/SitePostLogin.controller. This controller manages login tokens between brX and Salesforce using the Salesforce platform cache. - Create a new platform cache partition:
- In Force.com Setup, open the Develop section.
- Click Platform Cache.
- Click "New Platform Cache Partition".
- Set label and name to
tokenand mark as default. - Allocate sufficient space based on expected user volume.
- Save the partition.
- Create a new Visualforce page and copy the content from
src/main/salesforcecc/SitePostLogin.page. - Enable this page in the B2B Customer Community Profile and enable the
SitePostLogincontroller in Apex access. - Update the federated login URL in the
.propertiesfile. If your Visualforce page is namedCustomSiteLogin, use this in thesalesforcecc.storefront.user.signin.urlproperty. - Configure logout handling:
- Set the logout URL (e.g.,
https://<your_b2b_instance>/DefaultStore/secur/logout.jsp) in thesalesforcecc.storefront.user.signout.urlproperty.
- Set the logout URL (e.g.,
To verify, access <your_brX_instance>/login, log in with the test account, and confirm that you are redirected back to your brX instance. The login status should display your user information.
Delegated Password Change
- Replace the existing
ChangePasswordVisualforce page with the content fromsrc/main/salesforcecc/ChangePassword.page. This page includes a hidden field for the redirect URL. - Replace the
ChangePasswordControllerApex class with the content fromsrc/main/salesforcecc/ChangePassword.controller. - The password change operation is available at
https://<your_brX_instance>/account/creds. This URL redirects users to the Salesforce Change Password Visualforce page. Configure the redirect URL in the.propertiesfile using thesalesforcecc.storefront.user.changePassword.urlproperty.
To verify, change the password for the test user and log in again using the new password. You should be redirected back to your brX instance.
B2B Customer Community Settings
After installing the required Visualforce pages and controllers, configure the B2B Customer Community:
- Open the B2B Customer Community settings as described in the Salesforce documentation.
- Click the Administration tab.
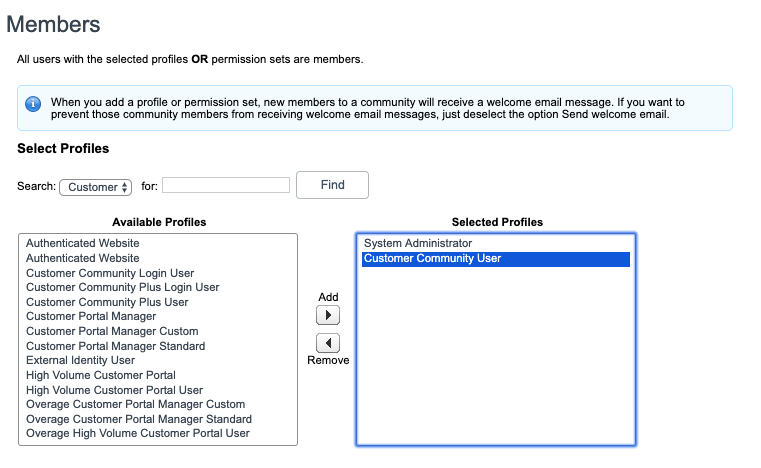
- Enable the "Customer Community User" profile in the "Members" menu. This profile allows B2B customers to log in to the Accelerator.
- Click the "Login & Registration" tab and configure as shown:
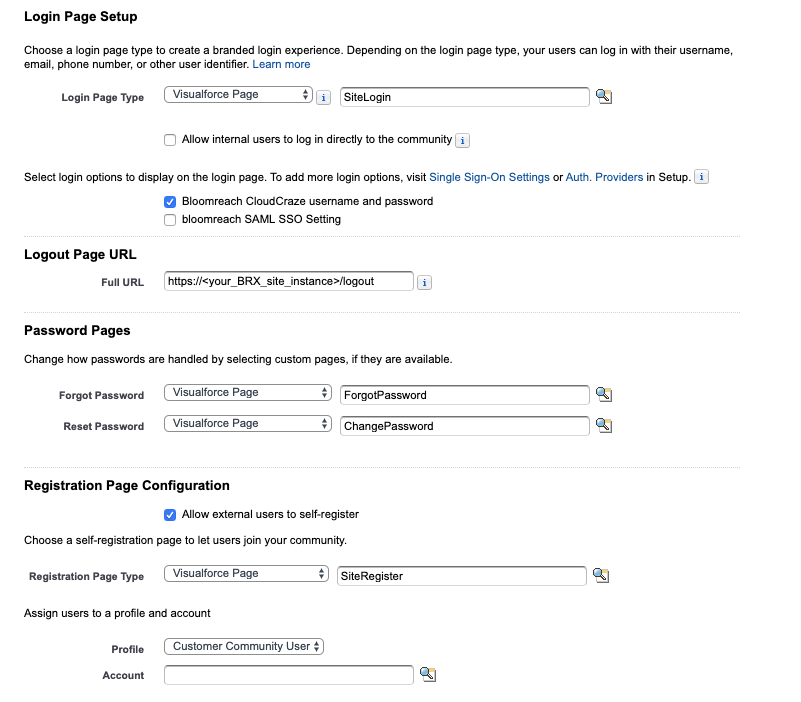
- Enable "Allow external user to Self-Register". Refer to Salesforce documentation for details.
- Set the "Logout Page URL" to point to your brX site instance, specifically to the
/logoutsitemap item.
B2B Customer Community Email
To customize email templates:
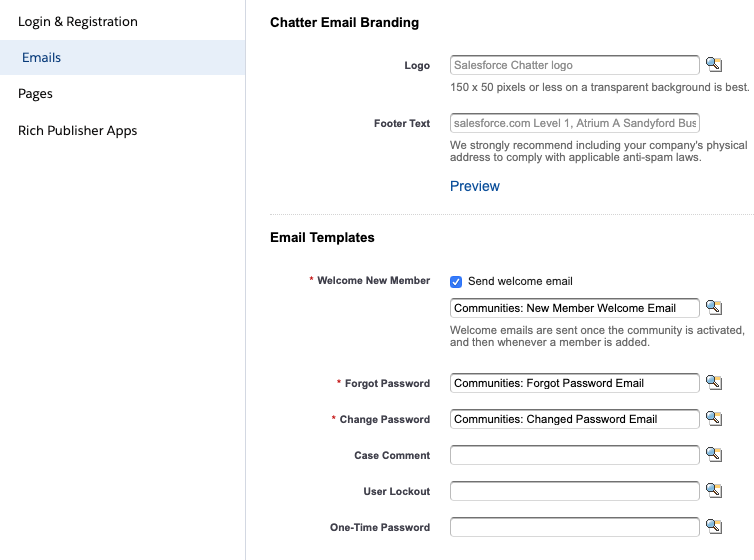
- Edit the "Classic Email Template" as described in the Salesforce documentation.
- If you add a new email template, update the configuration in your Customer Community settings:
References
- Salesforce B2B Commerce Documentation: https://cloudcraze.atlassian.net/wiki/spaces/CCRZDOCS49S/