Edit a Document
To edit a document, open it in the Document Viewer. Navigate to the relevant parent folder in the Content application and select the document. The document will open in the Document Viewer. In the viewer's menu bar, click Edit to enter editing mode. You can now modify all editable fields in the document.
Document types may include fields that are not displayed on the website. Some fields store metadata used for categorization or internal processing.
Hint: You can also edit a document directly from the channel preview.
Editing Rich Text
Some fields use a rich text editor. These fields typically contain the main content that appears on the website. The rich text editor supports text formatting (such as size, color, and decoration), creating links, and embedding images or videos. You can enter HTML tags, but use this feature with caution. The final rendering may differ from the editor preview, and an HTML cleaner may modify or remove unsupported tags.
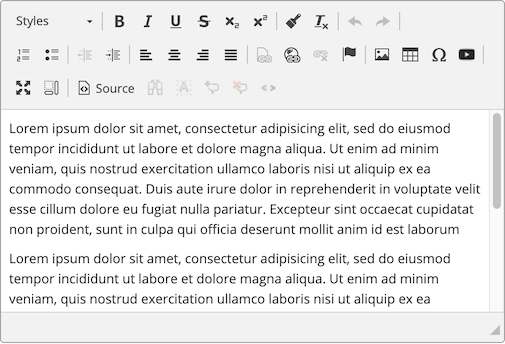
The rich text editor toolbar contains several button groups:
- Predefined styles
- Formatting
- Undo and Redo
- Paragraph formatting
- Lists
- Indentation
- Alignment
- Links
- Inserts
- Editor mode
- Source code editor
Predefined styles are mainly used for headers or to reset text to the default style. You can add custom predefined styles if needed.

Formatting buttons allow you to apply styles such as bold, italic, underline, and other common text formatting options.

Undo and redo buttons let you revert or reapply recent changes. For example, if you delete text unintentionally, click the left arrow (undo) to restore it. To redo the change, click the right arrow (redo).

Paragraph formatting includes three subgroups:
- Lists: Create ordered or unordered lists.
- Indentation: Increase or decrease paragraph indentation.
- Alignment: Set paragraph alignment.
All actions apply to entire paragraphs (text between line breaks). To format multiple paragraphs, select them before applying an action.
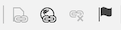
The links group provides options for internal and external links, removing links, and creating anchors.
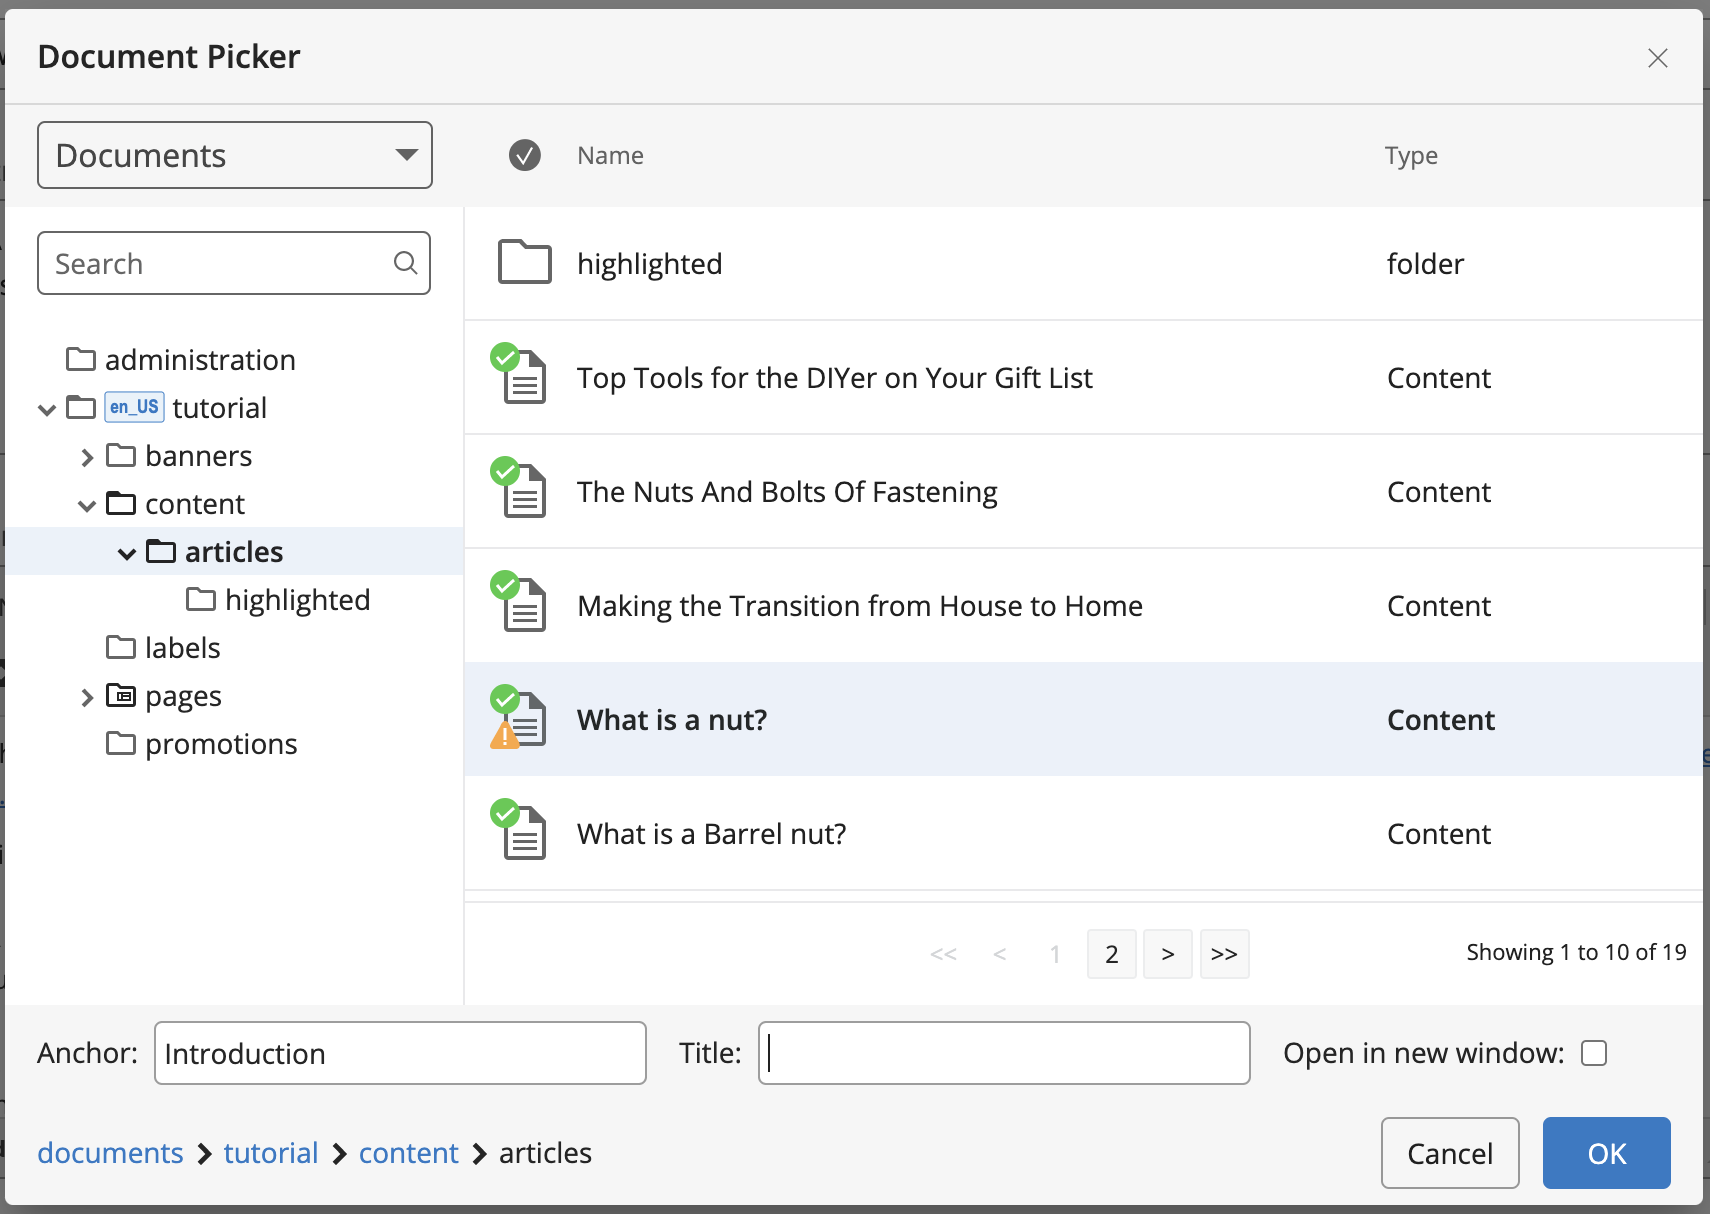
- To create an internal link, select text and click the internal link button. A popup with the document picker will appear. You can also specify an Anchor, Title (tooltip), and whether the link should Open in new window.
- To create an external link, select text and click the external link button. If no text is selected, the URL will be inserted at the cursor position. If text is selected, it becomes the link text.
- To remove a link, place the cursor on the link and click the unlink button.
- To create an anchor, select text and click the anchor (flag) button. After creating an anchor, select the word you want to link and create an external link. In the popup, choose “Link to anchor in text,” select the anchor, and click OK.
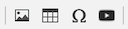
Inserts allow you to add images, tables, special symbols, and YouTube videos:
- Images: Opens the Image Picker to select and insert an image.
- Tables: Opens a dialog to configure rows, columns, and settings. To modify a table after creation, right-click the table.
- Special characters: Insert characters not available on your keyboard (e.g., €).
- YouTube videos: Embed a video by entering the embed code or video URL. You can adjust size and start time.

Editor modes include:
- Fullscreen: Click the button with four outward arrows to expand the editor to the full browser window. Click again to return to embedded mode.
- Block display: Show HTML block boundaries (e.g., paragraphs) with borders and labels.

Source code editor: Click Source to view and edit the HTML source. You can comment or uncomment HTML code. Autocomplete for HTML tags is enabled by default and can be toggled with the <> button.
The editor supports keyboard shortcuts for efficient editing.
Working with a Document
- Esc: Close a dialog, drop-down, or context menu. Move from submenu to parent menu.
- Enter: Select a toolbar option or confirm a dialog.
- Shift+F10, Menu/Application key: Open the context menu for the selected element.
Navigation
- Home: Move to the start of the line.
- Ctrl+Home: Move to the start of the document.
- End: Move to the end of the line.
- Ctrl+End: Move to the end of the document.
- PgDn: Scroll down by one editor viewport.
- PgUp: Scroll up by one editor viewport.
- Ctrl+Arrow: Move word by word.
Writing
- Enter (Return): End the current paragraph and start a new one.
- Shift+Enter: Insert a line break.
- Backspace, Del: Delete a character.
- Ctrl+Backspace, Ctrl+Del: Delete a word.
Undo and Redo
- Ctrl+Z: Undo the last action.
- Ctrl+Y: Redo the last undone action.
Cut, Copy, and Paste
- Ctrl+X, Shift+Del: Cut selected text.
- Ctrl+C: Copy selected text.
- Ctrl+V, Shift+Insert: Paste text from the clipboard.
Text Selection
- Ctrl+A: Select all content.
- Shift+Arrow: Select text by character.
- Ctrl+Shift+Arrow: Select text by word.
- Shift+Home: Select from cursor to start of line.
- Shift+End: Select from cursor to end of line.
- Ctrl+Shift+Home: Select from cursor to start of document.
- Ctrl+Shift+End: Select from cursor to end of document.
- Shift+PgDn: Select one viewport down from cursor.
- Shift+PgUp: Select one viewport up from cursor.
Text Styling
- Ctrl+B: Apply bold formatting.
- Ctrl+I: Apply italic formatting.
- Ctrl+U: Apply underline formatting.
Rich Text
- Ctrl+L: Open the Link (external link) dialog.
For more details, refer to the CKEditor Documentation.
Saving Changes
While editing, you work on a draft version of the document. The available save options depend on whether the document is new or existing.
- For new documents:
Save as draft,Save, andDoneare available. - For existing documents: Only
SaveandDoneare available.
Save as draft
Info: The
Save as draftfeature is available starting from brXM 14.3.0.
Use Save as draft to save a new document before all required fields are complete. The editor will close. To continue editing, click Edit on the draft. To discard the draft, click Cancel while editing.
A new document saved as draft cannot be previewed in a channel in the Experience manager.
Save
Click Save to persist your changes and continue editing. All required fields must be completed before saving.
Done
Click Done to save your changes and close the editor. All required fields must be completed. After saving, you can:
- Click
Viewto preview the document in a channel in the Experience manager. - Click
Editto make further changes. - Click
Publicationto access publication workflow options (availability depends on your privileges).