Page Management
Users with webmaster privileges can add, edit, move, copy, and delete individual pages in the Channel Editor.
Adding a Page
You can add a new page regardless of the page you are currently viewing.
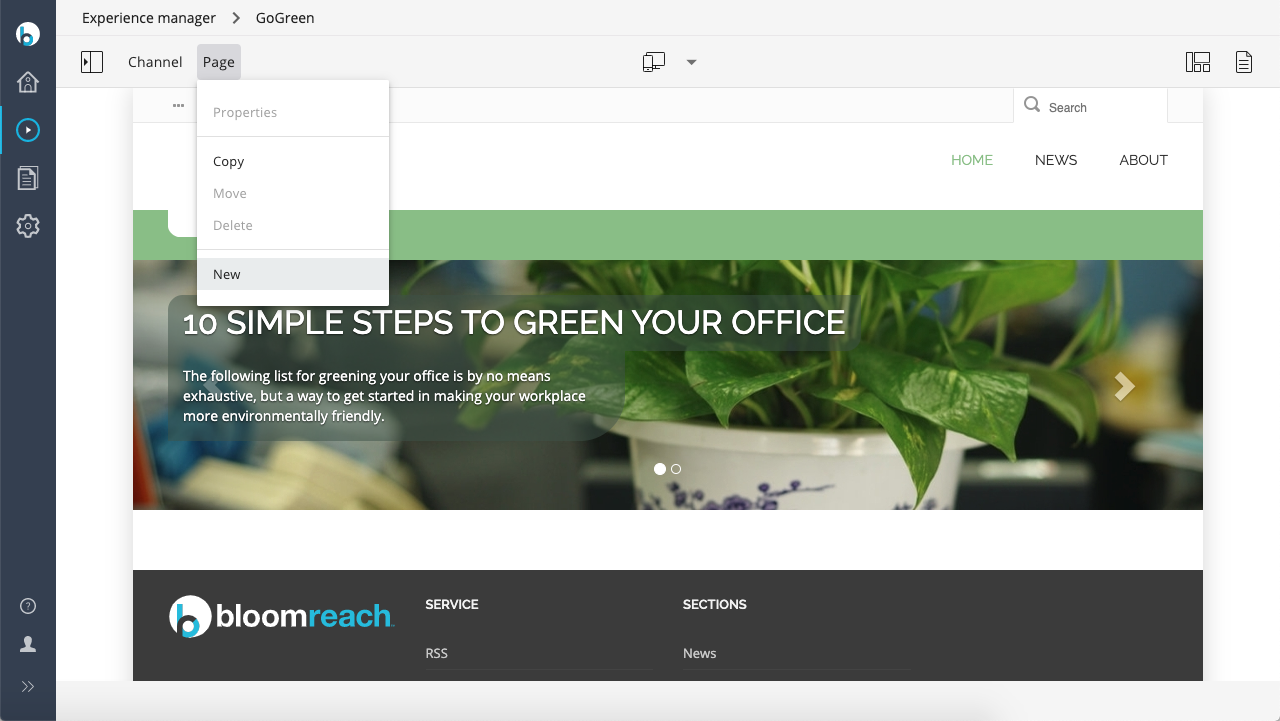
In the Channel Editor toolbar, open the Page drop-down and select New. This option is enabled if the current channel supports new page creation. Selecting it opens the New page form.
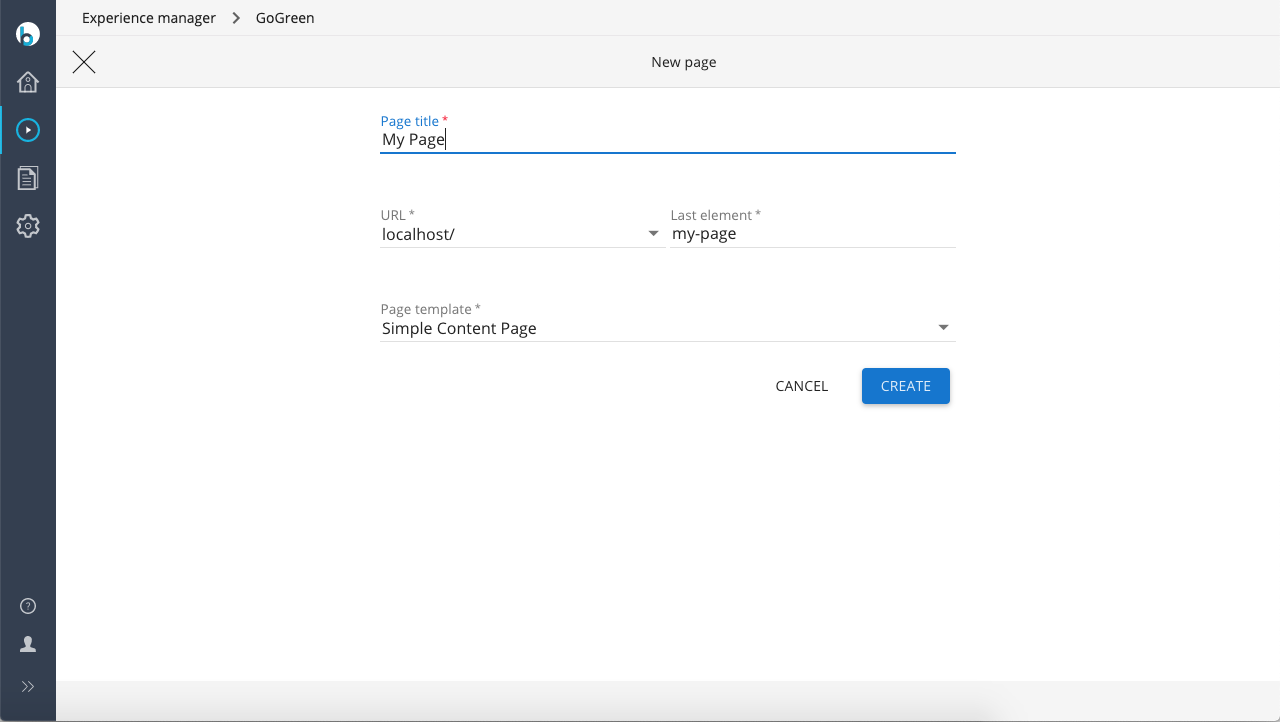
In the form, enter a page title (used for Sitemap Navigation), specify the URL, and select a page template. The URL consists of a "stem" (an existing sitemap item) and a Last element. The final URL is the combination of these two parts. The Page template determines the page layout and available containers. After creating the page, the Channel Editor displays the new page. At this stage, the page is only visible in the Channel Editor. To make the page available on the live channel, publish your changes. To revert, discard your changes. You can also use a software hook to trigger custom actions after the Create button is clicked.
Note: If you discard your changes while viewing the newly added page, the Channel Editor will attempt to display a page that no longer exists. This will likely result in a 404 page not found error.
Note: The Last element field does not accept certain characters, including '/'. For example, to add a page at
www.example.com/blogs/myblog, first create a page atwww.example.com/blogs. Pages can only be added to the modifiable part of the channel's sitemap. Ifwww.example.com/blogsexists in the fixed part of the sitemap, you cannot add a page atwww.example.com/blogs/myblog.
Technical Details
To add a page to a channel, the channel must have at least one URL stem and at least one available prototype page. When you save a new page, the backend performs these steps:
- Copies the selected prototype page into the
hst:pagessection of the channel's workspace. - Adds a sitemap item to the
hst:sitemapsection of the channel's workspace, based on the page's URL. - Stores the page title in the
hst:pagetitleproperty of the new sitemap item. - Links the new sitemap item to the copied page definition.
To render the page title in Freemarker:
<@hst.defineObjects/> The page title is: ${hstRequestContext.resolvedSiteMapItem.pageTitle?html}
Or in JSP:
<hst:defineObjects/> The page title is: <c:out value="${hstRequestContext.resolvedSiteMapItem.pageTitle}"/>
Managing a Page
You can edit, move, copy, or delete existing pages.
Selecting a Page to Manage
To manage a page, navigate to it in the Channel Editor. Use the site's menu, internal links, or the Sitemap navigation. To use Sitemap navigation, open the side navigation by clicking the icon in the top left of the toolbar and select the Sitemap tab. The side navigation lists the channel's sitemap items. Click a sitemap item to open the corresponding page.
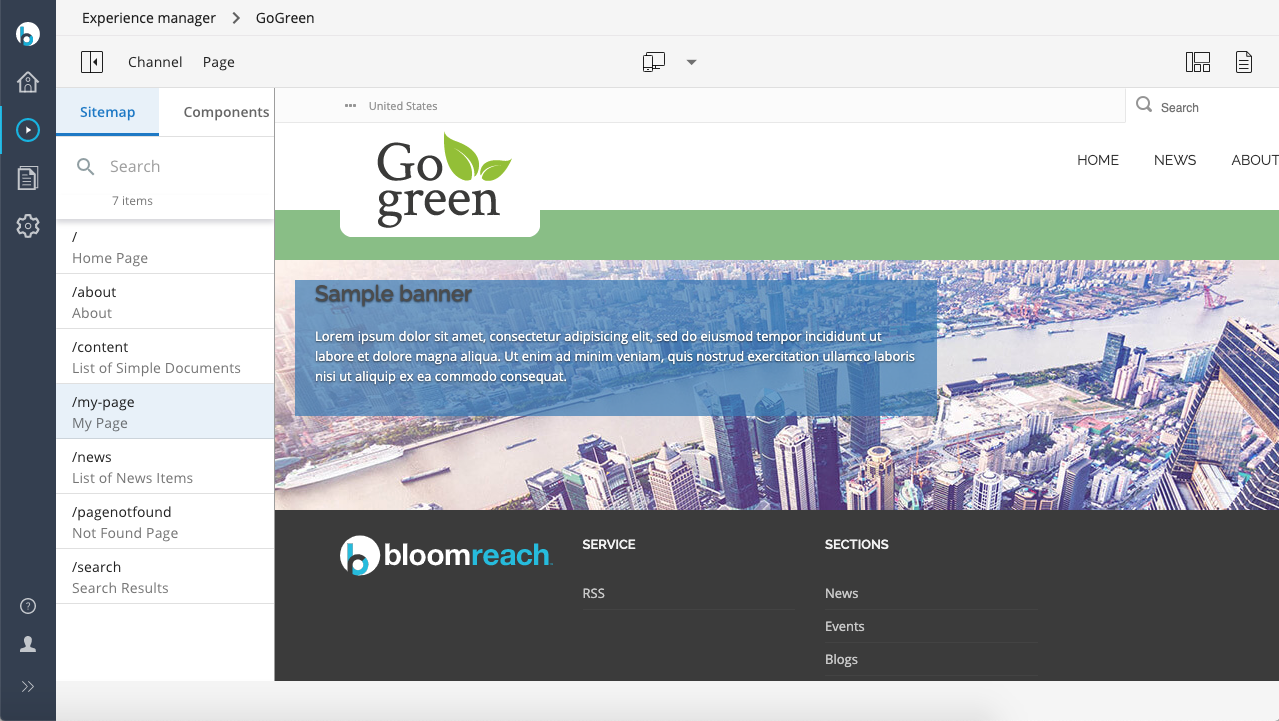
Note: Sitemap navigation only displays sitemap items with explicit names. Sitemap items that derive their URL names from documents are not shown in the navigation.
Controlling Sitemap Navigation
To hide a sitemap item from the Sitemap navigation, set the hst:hiddeninchannelmanager property on that item. This is useful for hiding items not relevant to users, such as sitemap items for RSS feeds.
/hst:sitemap: /rss: hst:hiddeninchannelmanager: true /nested-rss-sitemap-item:
Sitemap items nested under a hidden item are also hidden from the navigation.
Selecting a Page Management Action
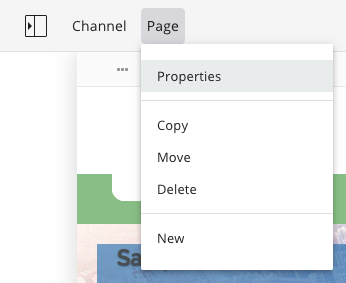
In Show components mode, the Channel Editor toolbar displays a Page drop-down with available management actions. Developers can use a software hook to add custom actions to these page actions.
Editing a Page
You can edit pages stored in the channel's workspace if they are not locked by another user. Select the Properties action from the drop-down to open the page properties form.
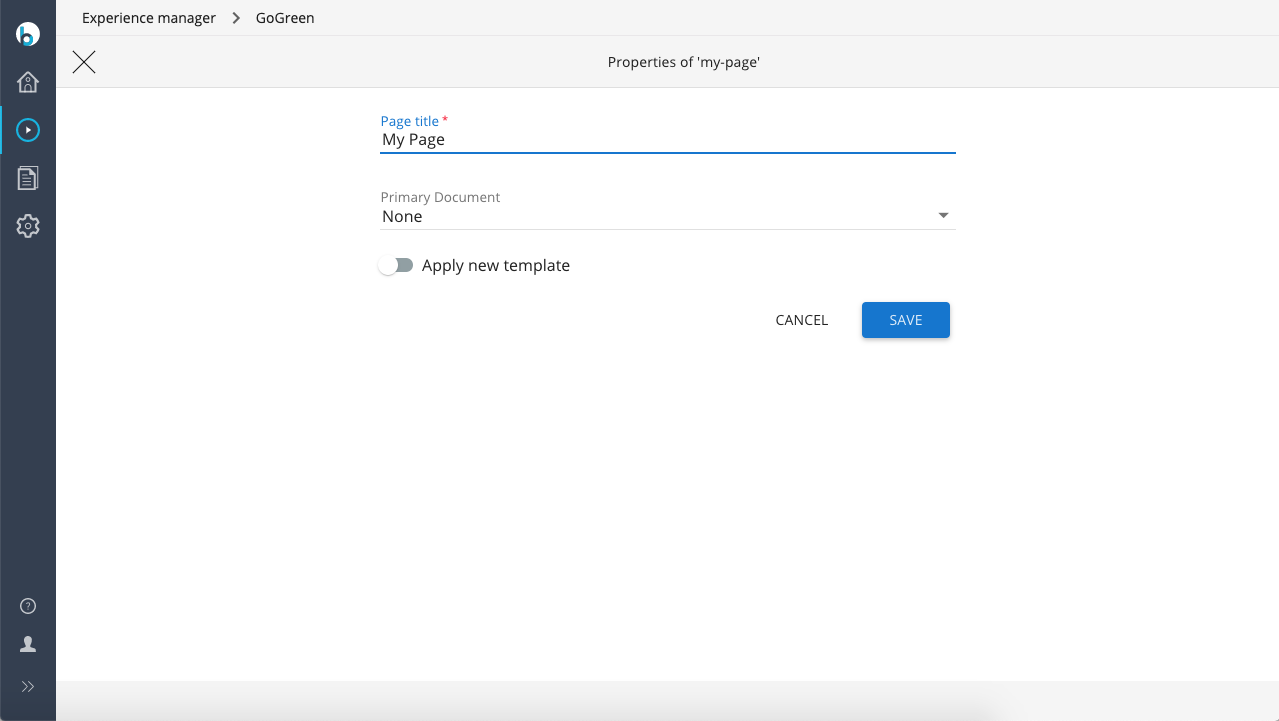
You can update the page title, select a Primary Document, and assign a new template.
Primary Document
The primary document can be selected from documents referenced by components on the page. For example, if a container component uses document X, you can select document X as the primary document. Assigning a primary document has these effects:
- You can create an internal link to this page by linking to its primary document.
- HST exposes the primary document through
HstRequestContext#getContentBean()when the page is requested. This enables features like the RelevanceTagsCollectorto add metadata from the primary document to the visitor profile. - Existing internal links to the primary document will resolve to this page.
Assigning a New Template
The Channel Editor allows you to assign a new template to an existing page, changing its layout. If the page contains containers with components, you must reassign components to containers in the new template. If the new template has no containers, components will be removed. The form displays an alert when you select a new template. To undo the change, leave the Edit page form and discard your changes.
When reassigning components, the following logic applies:
- Items remain in containers with the same name
If the new template has a container with the same JCR node name as one in the old template, items are moved to the new container, preserving order. - Items move to the primary container
Remaining items are moved to the primary container, defined by thehst:primarycontainerproperty. - Items move to the first container
Any remaining items are moved to the first container in the new template.
Publish your changes to make them live. Discard changes to revert.
Copying a Page
If the channel supports page creation, you can copy any page within the channel. The copy is always editable. You can configure your CMS project to allow or prevent copying pages between channels.
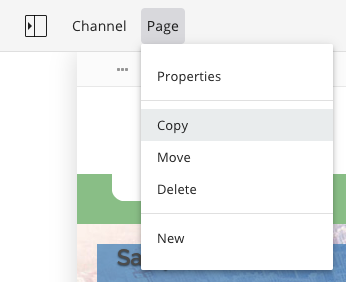
Select the Copy action from the drop-down to open the Copy page form.
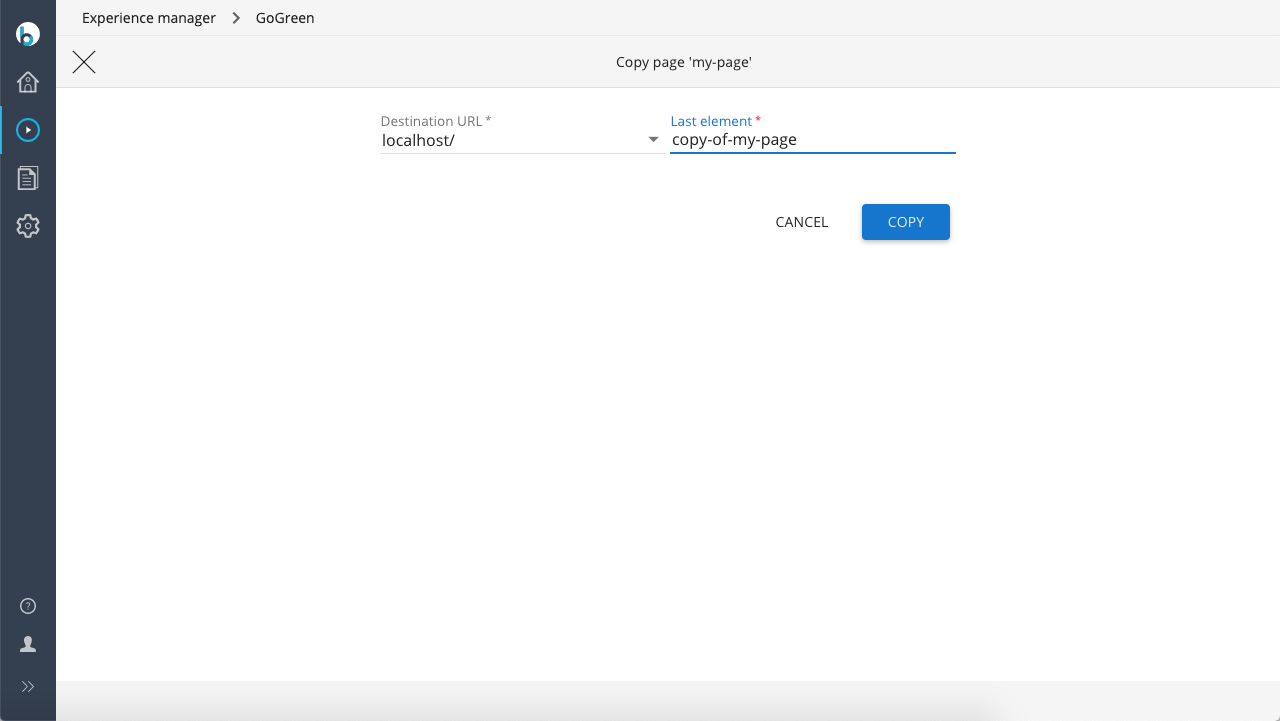
Specify the URL for the copy. If cross-channel copying is enabled, select the destination channel, then choose the URL stem and specify the Last element. The Last element cannot contain '/'. Click Copy to create the page. The copy appears in the Channel Editor and is only visible there until you publish your changes. You can delete the copy by discarding your changes or using the Delete action.
Moving a Page
You can move any editable page within the same channel. Moving pages between channels is not supported. Select the Move action from the drop-down to open the Move page form.
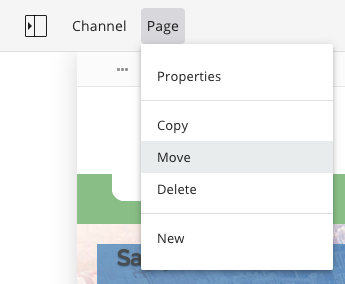
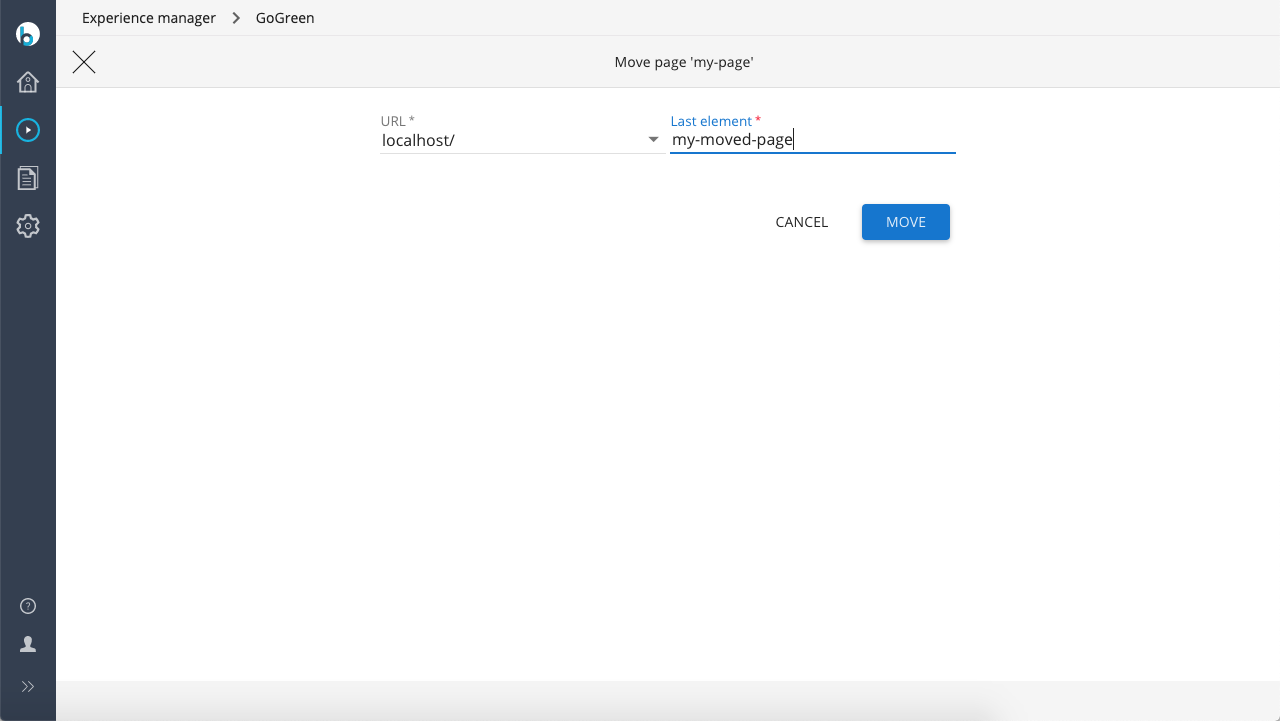
Select the new URL stem and specify the Last element for the page. Publish your changes to apply the move. Discard changes to revert.
Note: When you move a page with nested sub-pages in the sitemap, all sub-pages move as well. For example, moving
www.example.com/blogs(with a sub-page atwww.example.com/blogs/myblog) towww.example.com/archive/old-blogswill also move the sub-page towww.example.com/archive/old-blogs/myblog.
Deleting a Page
You can delete any editable page. Select the Delete action from the drop-down and confirm. After deletion, the Channel Editor navigates to the channel's home page. Publish your changes to remove the page from the live channel. Discard changes to undo the deletion.
Note: Deleting a page with nested sub-pages in the sitemap will also delete all sub-pages. For example, deleting
www.example.com/blogswill also deletewww.example.com/blogs/myblog.