API Agent Channel
Info: Bloomreach provides Enterprise support for this feature for Bloomreach Experience customers. The release cycle for this feature may differ from the core product release cycle.
Overview
The API Agent Channel Add-on integrates the Relevance Module with Plain JAX-RS Services in your project. This module relies on automatic Swagger API documentation support, configured through a Spring bean as described in Plain JAX-RS Services.
Problem Statement
When you use an HST-2 based application solely to provide REST APIs from the backend CMS (a "Headless Scenario" or "Content-as-a-Service" approach), integrating the Relevance Module with these REST APIs is challenging for the following reasons:
- The personalization features in the Relevance Module depend on component configurations. See Personalize a Component for details. However, REST APIs built with Plain JAX-RS Services cannot be directly linked to a channel. These services are configured at a specific mount, without any associated channel containing pages and components. As a result, you cannot configure personalization variants through component configurations for Plain JAX-RS Services.
- Developers have attempted workarounds, such as manually generating JSON output in HST template (*.ftl) pages and aggregating these outputs in the page response. This approach complicates development and maintenance, as it does not use JEE standards like JAX-RS or benefit from POJO-based mapping and binding available in most JAX-RS frameworks.
Solution
The API Agent Channel Add-on allows business users to configure personalization variants using Delegate Components within an Agent Channel associated with a Plain JAX-RS Services mount. The following diagram illustrates this architecture:
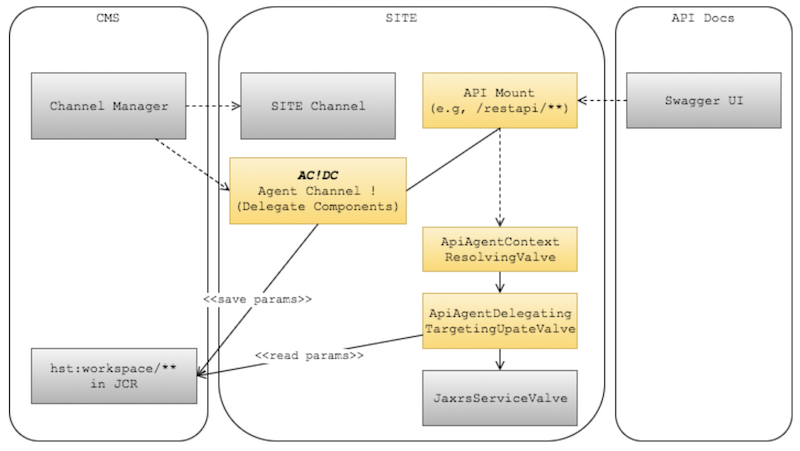
Diagram: The diagram is divided into three areas: CMS, SITE, and API Docs. In CMS, the Channel Manager connects to a SITE Channel and to an AC!DC Agent Channel with Delegate Components, which read and save parameters to hst:workspace/** in JCR. In SITE, an API Mount (such as /restapi/**) is linked to the AC!DC agent channel and processes requests through a chain of ApiAgentContextResolvingValve, ApiAgentDelegatingTargetingUpateValve, and JaxrsServiceValve. The API Mount also connects to Swagger UI in the API Docs area.
Assume you have configured a Plain JAX-RS Services mount (for example, /restapi/**). Because a REST API mount cannot be directly associated with a channel containing page and component configurations, the API Agent Channel Add-on provides a way to create an Agent Channel for the REST API mount. This Agent Channel can hold page and component configurations on behalf of the REST API mount. For each JAX-RS Service, the API Agent Channel automatically creates a Delegate Component to capture personalization variant configurations.
In summary:
- Developers can create an API Agent Channel for a Plain JAX-RS Services mount.
- Business users can configure personalization variants per JAX-RS Service class in the API Agent Channel and publish changes.
- At runtime, when requests are sent to the Plain JAX-RS Services mount (such as
/restapi/**), the API Agent Channel Add-on resolves the API Agent Channel and reads personalization variant parameters from the Delegate Components ("AC!DC") for the specific JAX-RS service. The JAX-RS service can access these personalized parameters using the@ParametersInfoannotation and@Context ParametersInfoProviderparameter, as described in RESTful JAX-RS Component Support in HST-2. The add-on injects the required valves into the Plain JAX-RS Service Pipeline to enable this functionality.
Installation and Configuration
For installation instructions, see the Install page. To configure the association between an API Agent Channel and a Plain JAX-RS Services mount, refer to the Configuration page.
Release information is available in the Release Notes.
Demo Project
Download the Demo Project
Download the demo project ZIP package from the following location (a Bloomreach Experience Developer account is required):
Select the appropriate version and download the ZIP artifact.
Build and Run the Demo Project
After extracting the ZIP file locally, build and run the demo project:
$ cd hippo-addon-api-agent-channel-demopkg-x.x.x $ mvn clean package && mvn -Pcargo.run
Demo Project Details
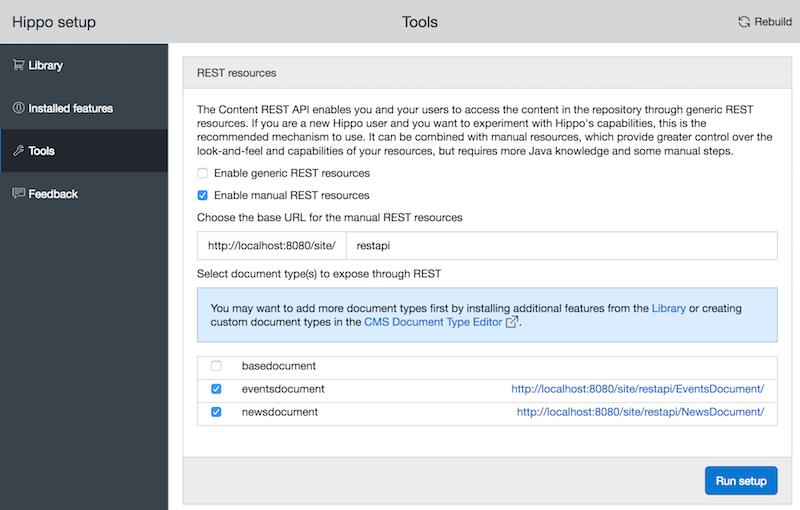
- The demo project was generated using the Bloomreach Content Maven Archetype and converted to a Bloomreach Content project.
- Two features, News and Events, were added using Essentials.
- Custom REST API Services for News (
http://localhost:8080/site/restapi/NewsDocument/**) and Events (http://localhost:8080/site/restapi/EventsDocument/) were also added using Essentials.
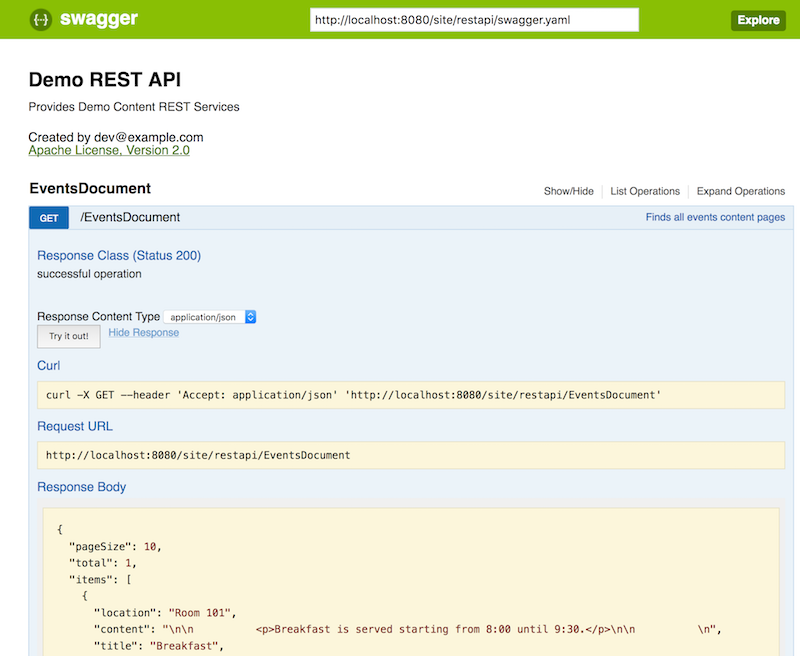
- Automatic Swagger Documentation generation is configured via a Spring bean, as described in RESTful API Support - Plain JAX-RS Services.
- The API Agent Channel add-on is installed in the project.
Demo Scenario
- Log in to
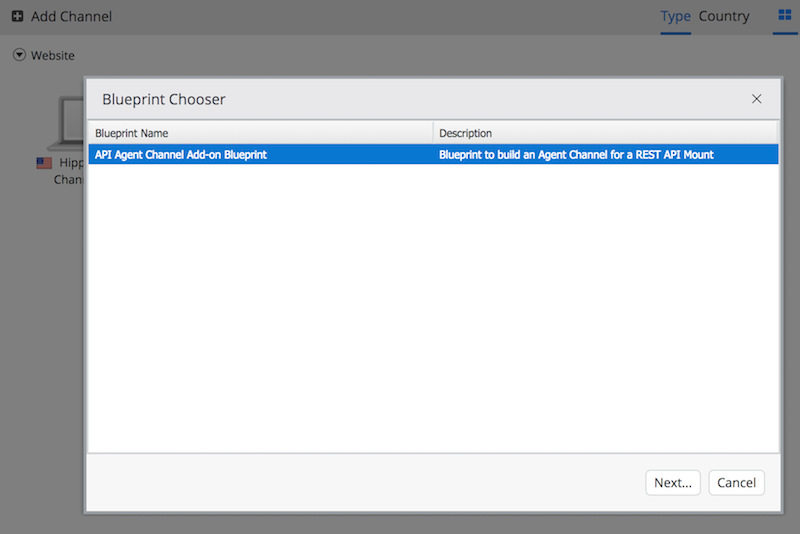
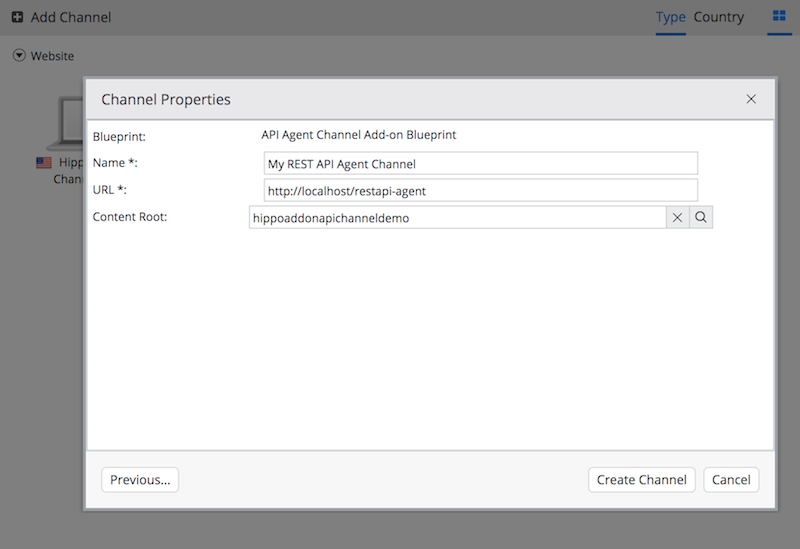
http://localhost:8080/cms/. - Select Experience manager and click Add Channel to create a new API Agent Channel for the
/restapimount. - Choose API Agent Channel Add-on Blueprint and click Next....
- In the Name field, enter a name such as "My REST API Agent Channel".
- In the URL field, enter
http://localhost/restapi-agent. - In the Content Root field, select a document folder and click Create Channel.
Note: You must select a valid folder. If not, the API Agent Channel will not display correctly.
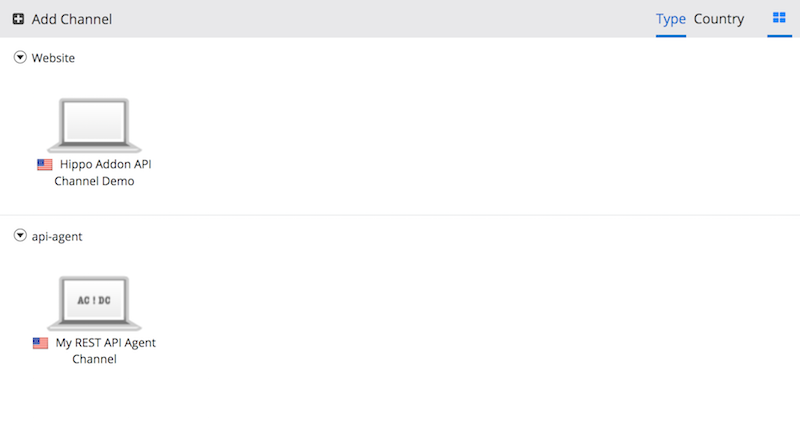
- You will see an AC!DC channel in the api-agent channel category.
- Click the AC!DC channel you just created.
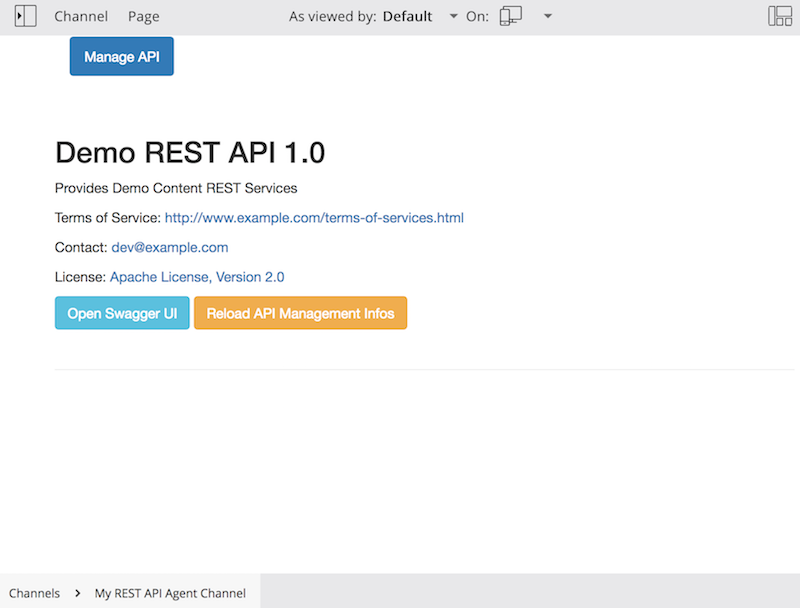
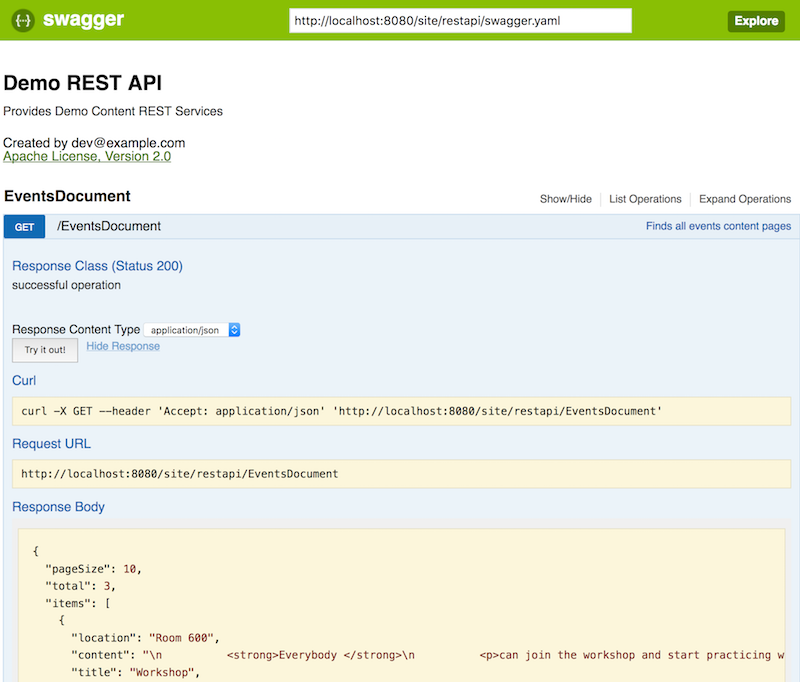
- Click Open Swagger UI and confirm the popup. The Swagger UI will open in a new browser tab, displaying the auto-generated API documentation.
- In the Swagger UI, click Try out for GET /EventsDocument. By default, you will see three results, as Essentials creates three Events documents during setup.
- Return to the Experience manager. At this point, you will not see any Delegate Components for the REST services.
- Click Reload API Management Infos and confirm the popup.
- Two Delegate Components will appear: one for the EventsDocument JAX-RS Service and one for the NewsDocument JAX-RS Service, as shown in the Swagger UI.
- Edit the EventsDocument Delegate Component and enter
foodin the api.tags parameter (under the Filter group).
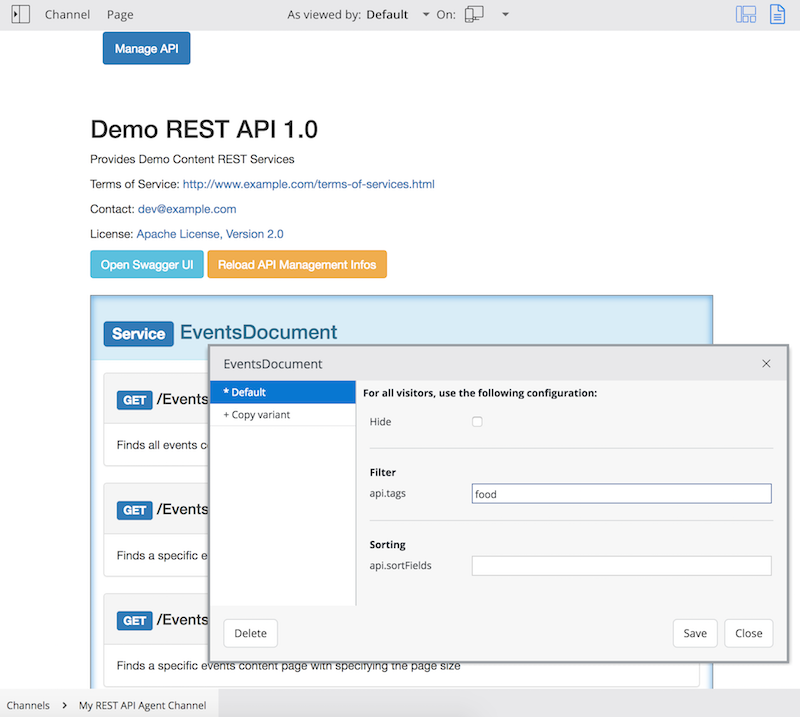
- Save and close the Delegate Component dialog, then publish the API Agent Channel.
- In the Swagger UI tab, click Try out for GET /EventsDocument again. This time, only one result will appear, showing the event document with the
foodtag (as only one Events document in CMS has this tag).