Develop the Products Feature Part 2: Products Overview Page
Previous Step
Develop the Products Feature Part 1: Products Document Type
After creating the Product document type and content bean, you can now implement the Products Overview page. This process includes configuring the page and its URL, assigning a Java component for business logic, and creating a Freemarker template to render the product data.
Products Overview Page
Open the Console in your browser at http://localhost:8080/cms/console/. Log in with username admin and password admin.
Navigate to /hst:gogreen/hst:configurations/gogreen/hst:pages. This location stores page configurations.
Create a new node named productslist of type hst:component.
Add the property hst:referencecomponent to the productslist node with the value hst:abstractpages/twocolumns.
/hst:gogreen/hst:configurations/gogreen/hst:pages/productslist: jcr:primaryType: hst:component hst:referencecomponent: hst:abstractpages/twocolumns
This configuration defines a new page, productslist, which extends the twocolumns abstract page configuration. You will configure the content area in a later step.
Next, go to /hst:gogreen/hst:configurations/gogreen/hst:sitemap. This section maps URLs to content paths and page configurations.
Create a new node named products of type hst:sitemapitem.
Add the property hst:componentconfigurationid to the products node with the value hst:pages/productslist.
Add the property hst:relativecontentpath to the products node with the value products.
/hst:gogreen/hst:configurations/gogreen/hst:sitemap/products: jcr:primaryType: hst:sitemapitem hst:componentconfigurationid: hst:pages/productslist hst:relativecontentpath: products
This configuration sets up the relative URL products to use the productslist page configuration and display content from the products path, relative to the content root.
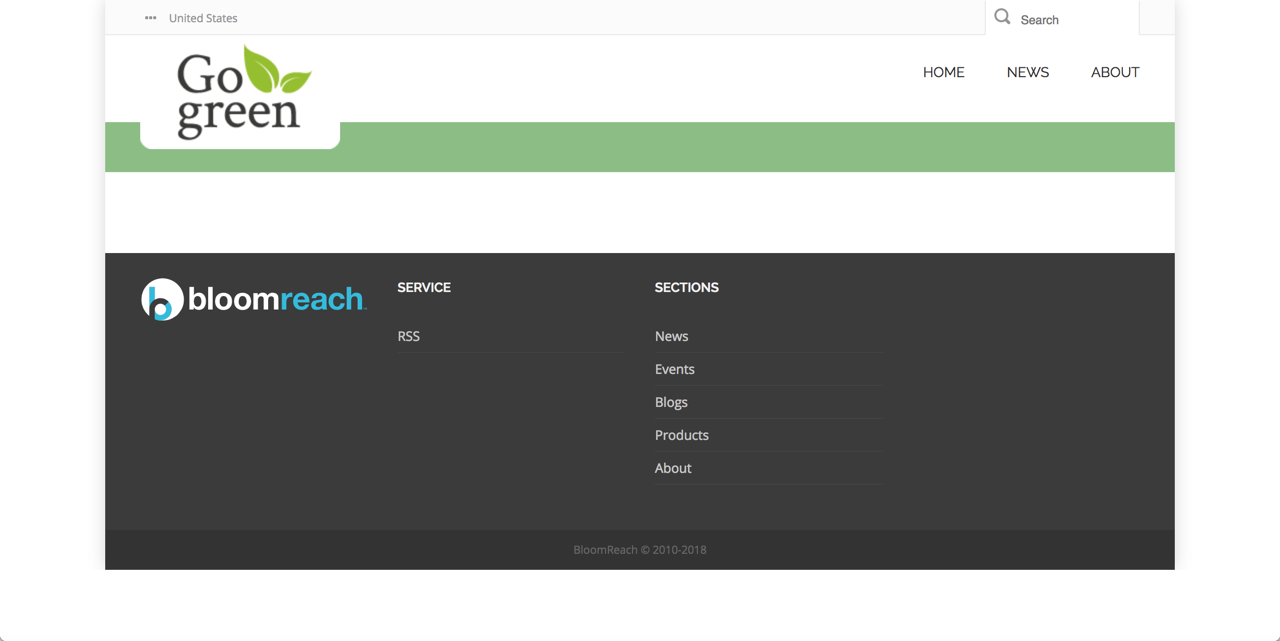
Open http://localhost:8080/site/products in your browser. At this stage, the page displays shared layout elements, but the content area remains empty.
Products Overview Business Logic
Business logic for a delivery tier component is implemented in a Java class. Bloomreach Content Developer Essentials provides pre-built components for common scenarios. The List Component retrieves a collection of documents from the repository and exposes them as a paginated list, which matches the requirements for the Products Overview.
Key details for the List Component:
- Java class:
org.onehippo.cms7.essentials.components.EssentialsListComponent - The paginated list is available in the render attribute:
pageable
Products Overview Template
The List Component does not include a default template. You need to create one.
Open the products.html file from your web design.
Find the <div class="col-md-9 col-sm-9"> element. This section contains the markup for the Products Overview.
Create the file repository-data/webfiles/src/main/resources/site/freemarker/gogreen/productslist.ftl in your project. This Freemarker template will render the Products Overview.
Add the following line to productslist.ftl:
<#include "../include/imports.ftl">
You will implement the template logic in the next steps.
In the Console, navigate to /hst:gogreen/hst:configurations/gogreen/hst:templates. This is where template configurations are managed.
Create a new node named productslist of type hst:template.
Add the property hst:renderpath to the productslist node with the value webfile:/freemarker/gogreen/productslist.ftl.
/hst:gogreen/hst:configurations/gogreen/hst:templates/productslist: jcr:primaryType: hst:template hst:renderpath: webfile:/freemarker/gogreen/productslist.ftl
Next, go to /hst:gogreen/hst:configurations/gogreen/hst:pages/productslist.
Add a new node named main of type hst:component.
Within main, add a child node named left of type hst:component.
Add the property hst:componentclassname to the left node with the value org.onehippo.cms7.essentials.components.EssentialsListComponent.
Add the property hst:template to the left node with the value productslist.
/hst:gogreen/hst:configurations/gogreen/hst:pages/productslist /main: jcr:primaryType: hst:component /left: jcr:primaryType: hst:component hst:componentclassname: org.onehippo.cms7.essentials.components.EssentialsListComponent hst:template: productslist
This configuration sets the left column of the productslist page to use the List Component for business logic and the productslist template for rendering.
Open productslist.ftl again.
Use Freemarker to render the product documents as HTML, following your web design. The implementation is similar to the News Overview template from the previous sprint. Consider the following:
- Use the 'smallsquare' image variant for product images.
- Add an edit button in channel preview for each product using the @hst.manageContent tag.
- Product ratings are not included in this iteration; comment out the related markup (
<#-- -->). - Reuse the pagination template as needed.
A typical implementation looks like this:
<#include "../include/imports.ftl"> <#if pageable??> <div id="masonry-elements"> <#list pageable.items as item> <@hst.link var="link" hippobean=item/> <div class="feature blog-masonry"> <#if item.images?? && item.images[0].smallsquare??> <@hst.link var="img" hippobean=item.images[0].smallsquare /> <div class="feature-image img-overlay"> <@hst.manageContent hippobean=item /> <img src="${img}" alt="" /> <div class="item-img-overlay"> <div class="item_img_overlay_link"> <a href="${link}" title="${item.title?html}"> </a> </div> <div class="item_img_overlay_content"> <h3 class="thumb-label-item-title"> <a href="${link}">Add to cart</a> </h3> </div> </div> </div> </#if> <div class="feature-content"> <h3 class="h3-body-title blog-title"> <a href="${link}">${item.title?html}</a> </h3> <p>${item.introduction?html}</p> </div> <div class="feature-details"> <img src="<@hst.webfile path="/images/icon-banknote.png"/>" class="icon"> <span><@fmt.formatNumber value="${item.price}" type="currency" /></span> <#--<div class="feature-share"><span data-score="3.5" class="product-rating"/></div>--> </div> </div> </#list> </div> <#if cparam.showPagination> <#include "../include/pagination.ftl"> </#if> </#if>
Head Contributions
The Products Overview page requires a specific script and stylesheet. You must include these resources in the page.
Open products.html and locate the CSS and JavaScript references marked by these comments:
<!-- start page specific css --> <!-- end page specific css -->
and
<!-- start page specific js --> <!-- end page specific js -->
Include each reference in productslist.ftl as a head contribution. Head contributions allow templates to add markup to the HTML <head> element, typically defined in the top-level template (repository-data/webfiles/src/main/resources/site/freemarker/gogreen/base-layout.ftl).
You can place head contributions anywhere in the template, but grouping them at the top or bottom is recommended.
Guidelines:
- Each
<@hst.headContribution>tag can contain only one child element, such as<script>or<link>. - Use the
categoryattribute to specify the contribution type. Review your top-level template to confirm which categories are supported. - For reference, see
repository-data/webfiles/src/main/resources/site/freemarker/hstdefault/essentials-carousel.ftl.
A typical implementation:
<@hst.headContribution category="htmlHead"> <link rel="stylesheet" href="<@hst.webfile path="/css/jquery.raty.css"/>" /> </@hst.headContribution> <@hst.headContribution category="htmlBodyEnd"> <script type="text/javascript" src="<@hst.webfile path="/js/jquery.raty.js"/>"></script> </@hst.headContribution> <@hst.headContribution category="htmlBodyEnd"> <script type="text/javascript"> jQuery(document).ready(function($) { $('#masonry-elements .product-rating').raty({ score: function() { return $(this).attr('data-score'); }, readOnly: true, half: true, starType : 'i' }); }); </script> </@hst.headContribution>
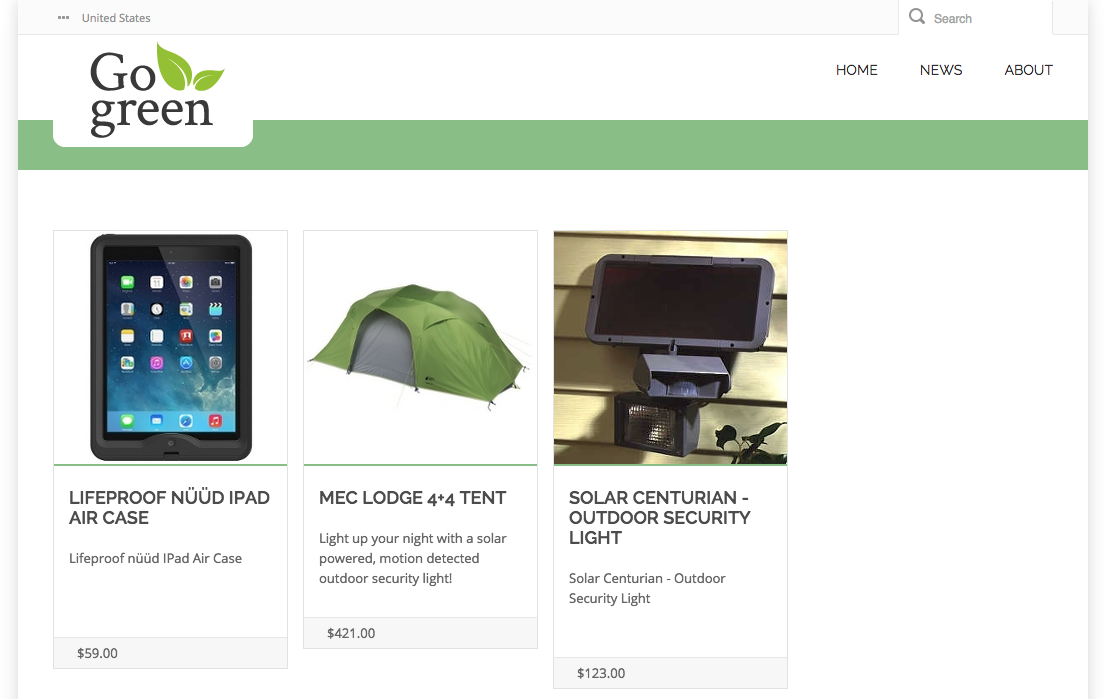
Navigate to http://localhost:8080/site/products in your browser. The page now displays the products you created in the CMS.
Navigation
To make the Products Overview page accessible from the navigation menu, add a link to it.
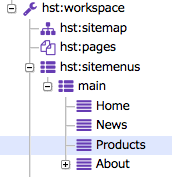
In the Console, go to /hst:gogreen/hst:configurations/gogreen/hst:workspace/hst:sitemenus/main.
Create a new node named Products of type hst:sitemenuitem.
Add the property hst:referencesitemapitem to the Products node with the value products.
Use the 'Up' button to move the Products node so it appears between News and About.
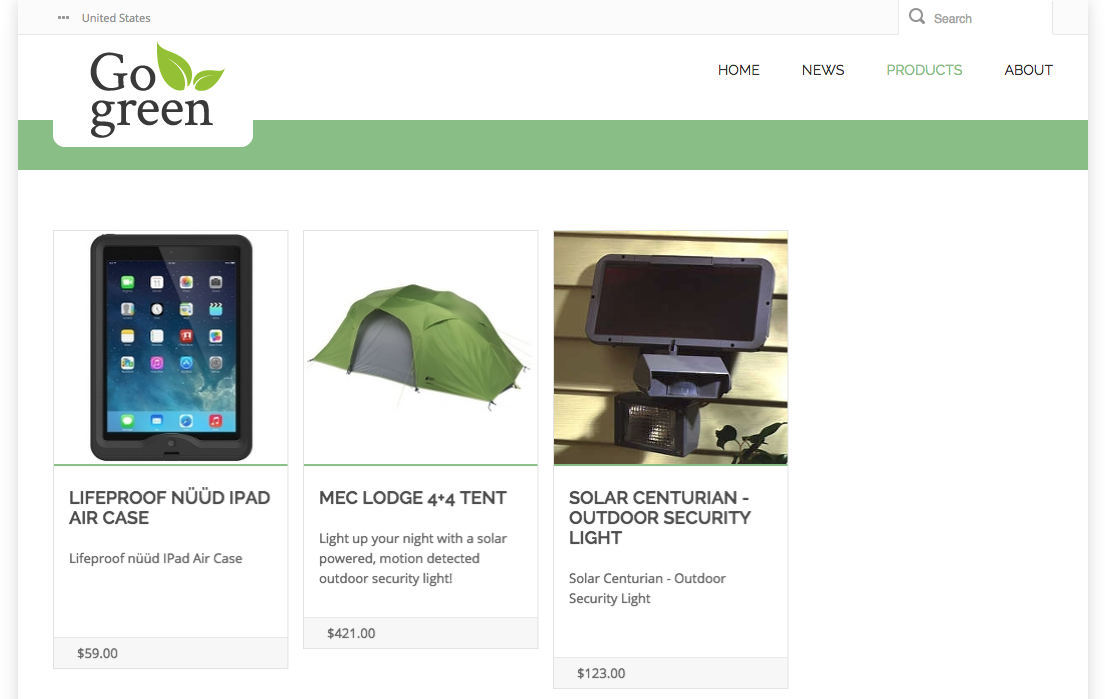
Reload the site in your browser. The Products item appears in the navigation menu. Clicking it loads the Products Overview page.
Next Step
Develop the Product Feature Part 3: Product Detail Page
Full Source Code
productslist.ftl
<#include "../include/imports.ftl"> <#if pageable??> <div id="masonry-elements"> <#list pageable.items as item> <@hst.link var="link" hippobean=item/> <div class="feature blog-masonry"> <#if item.images?? && item.images[0].smallsquare??> <@hst.link var="img" hippobean=item.images[0].smallsquare /> <div class="feature-image img-overlay"> <@hst.manageContent hippobean=item /> <img src="${img}" alt="" /> <div class="item-img-overlay"> <div class="item_img_overlay_link"> <a href="${link}" title="${item.title?html}"> </a> </div> <div class="item_img_overlay_content"> <h3 class="thumb-label-item-title"> <a href="${link}">Add to cart</a> </h3> </div> </div> </div> </#if> <div class="feature-content"> <h3 class="h3-body-title blog-title"> <a href="${link}">${item.title?html}</a> </h3> <p>${item.introduction?html}</p> </div> <div class="feature-details"> <img src="<@hst.webfile path="/images/icon-banknote.png"/>" class="icon"> <span><@fmt.formatNumber value="${item.price}" type="currency" /></span> <#--<div class="feature-share"><span data-score="3.5" class="product-rating"/></div>--> </div> </div> </#list> </div> <#if cparam.showPagination> <#include "../include/pagination.ftl"> </#if> </#if> <@hst.headContribution category="htmlHead"> <link rel="stylesheet" href="<@hst.webfile path="/css/jquery.raty.css"/>" /> </@hst.headContribution> <@hst.headContribution category="htmlBodyEnd"> <script type="text/javascript" src="<@hst.webfile path="/js/jquery.raty.js"/>"></script> </@hst.headContribution> <@hst.headContribution category="htmlBodyEnd"> <script type="text/javascript"> jQuery(document).ready(function($) { $('#masonry-elements .product-rating').raty({ score: function() { return $(this).attr('data-score'); }, readOnly: true, half: true, starType : 'i' }); }); </script> </@hst.headContribution>