Add the Secondary Navigation Menu to the About Page
Previous Step
Add a Two Columns Page Configuration
After configuring a two-column page and updating the News Overview, News Detail, and Content page configurations to extend it, you can now add a secondary navigation menu to the right column of the Content page configuration used by the About page.
Create a Freemarker Template for the Right Column Menu
-
Open the
about.htmlfile in your web design source. -
Find the
<div class="col-md-3 col-sm-3">element inabout.html. This element contains the markup for the right column menu. Select this<div>and all its contents, then copy it to your clipboard. -
In your project, create a new file at
repository-data/webfiles/src/main/resources/site/freemarker/gogreen/twocolumns-right-menu.ftl. This file will serve as the Freemarker template for the right column menu. -
At the top of the new template, add the following line:
<#include "../include/imports.ftl">
-
Paste the copied HTML markup below this line. The template now contains the static HTML for the menu.
-
In the Console, navigate to
/hst:gogreen/hst:configurations/gogreen/hst:templates. -
Add a new child node named
twocolumns-right-menuof typehst:template. -
Add a property
hst:renderpathto thetwocolumns-right-menunode and set its value towebfile:/freemarker/gogreen/twocolumns-right-menu.ftl.
/hst:gogreen/hst:configurations/gogreen/hst:templates/twocolumns-right-menu: jcr:primaryType: hst:template hst:renderpath: webfile:/freemarker/gogreen/twocolumns-right-menu.ftl
Add the Right Column to the About Page and Content Page Configurations
-
In the Console, go to
/hst:gogreen/hst:configurations/gogreen/hst:workspace/hst:pages/about-contentpage/main. -
Add a new child node named
rightof typehst:component. -
Add a property
hst:templateto therightnode and set its value totwocolumns-right-menu.
/hst:gogreen/hst:configurations/gogreen/hst:workspace/hst:pages/about-contentpage/main: jcr:primaryType: hst:component /left: jcr:primaryType: hst:containercomponent /right: jcr:primaryType: hst:component hst:template: twocolumns-right-menu
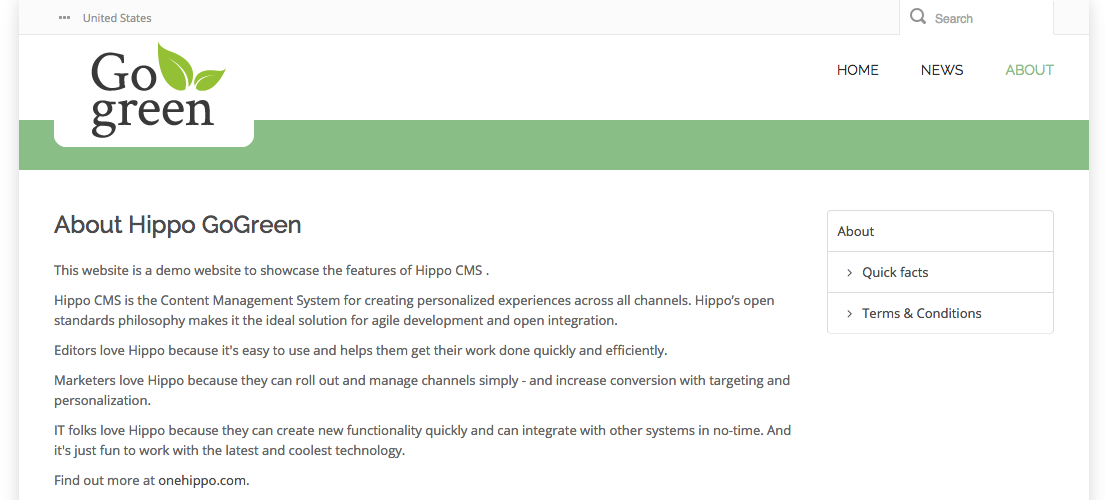
- Open your website in a browser and navigate to the About page. The static menu should now appear in the right column.
-
In the Console, go to
/hst:gogreen/hst:configurations/gogreen/hst:workspace/hst:pages/about-contentpage/main/right. -
Copy the
rightnode to/hst:gogreen/hst:configurations/gogreen/hst:pages/contentpage/main:
/hst:gogreen/hst:configurations/gogreen/hst:pages/contentpage/main: jcr:primaryType: hst:component /left: jcr:primaryType: hst:containercomponentreference /right: jcr:primaryType: hst:component hst:template: twocolumns-right-menu
Create Content
-
In the CMS, open the Content application and navigate to
GoGreen>content. -
Create two new content documents: "Quick Facts" and "Terms & Conditions". Use the content from the corresponding pages in your web design.
-
Publish both documents.
Make the Menu Dynamic
-
In the Console, navigate to
/hst:gogreen/hst:configurations/gogreen/hst:workspace/hst:sitemenus/main/About. -
Add a new child node named
Quick Factsof typehst:sitemenuitem. -
Add a property
hst:referencesitemapitemto theQuick Factsnode and set its value tocontent/quick-facts.html. -
Add another child node named
Terms & Conditionsof typehst:sitemenuitem. -
Add a property
hst:referencesitemapitemto theTerms & Conditionsnode and set its value tocontent/terms--conditions.html.
/hst:gogreen/hst:configurations/gogreen/hst:workspace/hst:sitemenus/main/About: jcr:primaryType: hst:sitemenuitem /Quick Facts: jcr:primaryType: hst:sitemenuitem hst:referencesitemapitem: content/quick-facts.html /Terms & Conditions: jcr:primaryType: hst:sitemenuitem hst:referencesitemapitem: content/terms--conditions.html
Note: This configuration uses the sitemap item at
/hst:gogreen/hst:configurations/gogreen/hst:sitemap/content/_any_.html, which was added by the Simple Content feature in Sprint 1.
-
In the Console, go to
/hst:gogreen/hst:configurations/gogreen/hst:workspace/hst:pages/about-contentpage/main/right. -
Add the property
hst:componentclassnameto therightnode and set its value toorg.onehippo.cms7.essentials.components.EssentialsMenuComponent. This component retrieves a menu from the content repository. -
Add the property
hst:parameternamesand set its value tomenu. -
Add the property
hst:parametervaluesand set its value tomain.
/hst:gogreen/hst:configurations/gogreen/hst:workspace/hst:pages/about-contentpage/main/right: jcr:primaryType: hst:component hst:componentclassname: org.onehippo.cms7.essentials.components.EssentialsMenuComponent hst:parameternames: [menu] hst:parametervalues: [main] hst:template: twocolumns-right-menu
This configuration enables the component to retrieve the main menu.
- Apply the same properties to
/hst:gogreen/hst:configurations/gogreen/hst:pages/contentpage/main/right:
/hst:gogreen/hst:configurations/gogreen/hst:pages/contentpage/main/right: jcr:primaryType: hst:component hst:componentclassname: org.onehippo.cms7.essentials.components.EssentialsMenuComponent hst:parameternames: [menu] hst:parametervalues: [main] hst:template: twocolumns-right-menu
- Update the
twocolumns-right-menu.ftltemplate to render menu items dynamically using Freemarker syntax.
Implementation details:
- The Menu component exposes the menu as a variable named
menuof typeorg.hippoecm.hst.core.sitemenu.HstSiteMenu. - Access menu items through the
siteMenuItemsattribute. - Access child menu items through the
childMenuItemsattribute. - Use the
hstLinkattribute for the resolved link.
A typical dynamic menu template looks like this:
<#include "../include/imports.ftl"> <#if menu??> <div class="hst-container"> <div class="hst-container-item"> <#if menu.siteMenuItems??> <#list menu.siteMenuItems as item> <#if item.selected || item.expanded> <div class="list-group left-nav"> <a href="<@hst.link link=item.hstLink/>" class="list-group-item level1">${item.name?html}</a> <#list item.childMenuItems as item> <a href="<@hst.link link=item.hstLink/>" class="list-group-item level2"><i class="fa fa-angle-right"> </i>${item.name?html}</a> </#list> </div> </#if> </#list> </#if> </div> </div> </#if>
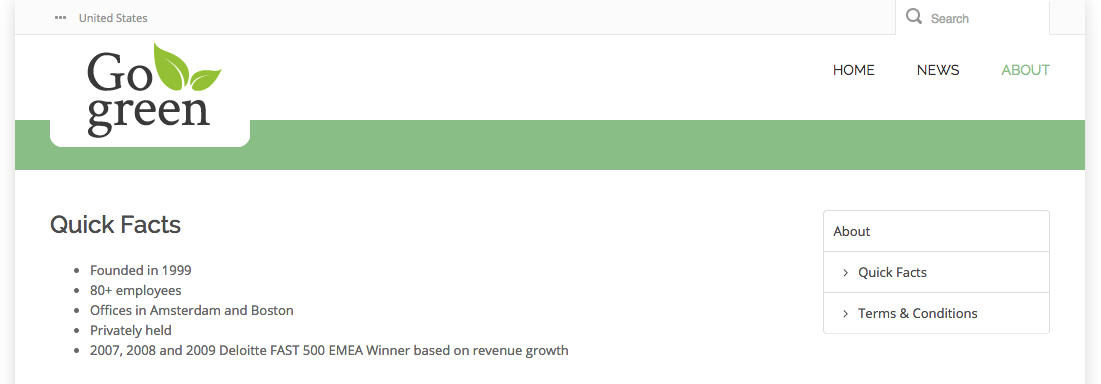
- Open the About page in your browser. The right column now displays the dynamic menu items you configured. Clicking a menu item navigates to the corresponding content page.
Next Step
Full Source Code
twocolumns-right-menu.ftl
<#include "../include/imports.ftl"> <#if menu??> <div class="hst-container"> <div class="hst-container-item"> <#if menu.siteMenuItems??> <#list menu.siteMenuItems as item> <#if item.selected || item.expanded> <div class="list-group left-nav"> <a href="<@hst.link link=item.hstLink/>" class="list-group-item level1">${item.name?html}</a> <#list item.childMenuItems as item> <a href="<@hst.link link=item.hstLink/>" class="list-group-item level2"><i class="fa fa-angle-right"> </i>${item.name?html}</a> </#list> </div> </#if> </#list> </#if> </div> </div> </#if>