Create a Selenium Test Case
To identify elements in the Bloomreach Content user interface, configure the context parameter output-wicketpaths in your project's conf/context.xml file:
<Parameter name="output-wicketpaths" value="true"/>
This setting adds a wicketpath attribute to each element that corresponds to a Wicket component. The wicketpath attribute provides a stable way to locate elements in the UI for automated testing.
Create a Selenium Test Case Using Selenium IDE
To use the Selenium IDE for Firefox to create test cases, you need to access the wicketpath attribute easily. You can achieve this by adding a user extension to Selenium IDE.
1. Create the Extension
- Create a folder named
wicketPathLocatorBuilder. - Inside this folder, create a file called
user-extension.js. - Add the following code to
user-extension.js:
LocatorBuilders.add('wicketpath', function(e) { this.log.debug("wicketpath: e=" + e); if (e.attributes && e.hasAttribute("wicketpath")) { this.log.info("found attribute " + e.getAttribute("wicketpath")); return "//" + this.xpathHtmlElement(e.nodeName.toLowerCase()) + "[@wicketpath=" + this.attributeValue(e.getAttribute("wicketpath")) + "]"; } return null; }); LocatorBuilders.order.unshift(LocatorBuilders.order.pop());
2. Install and Configure Selenium IDE
- Install the Selenium IDE plugin for Firefox from seleniumhq.org/download.
- Open Selenium IDE.
- Navigate to Options > Options.
- In the Selenium Core extensions input field, enter the path to the
user-extension.jsfile you created. - Restart Firefox to apply the changes.
3. Record a Test
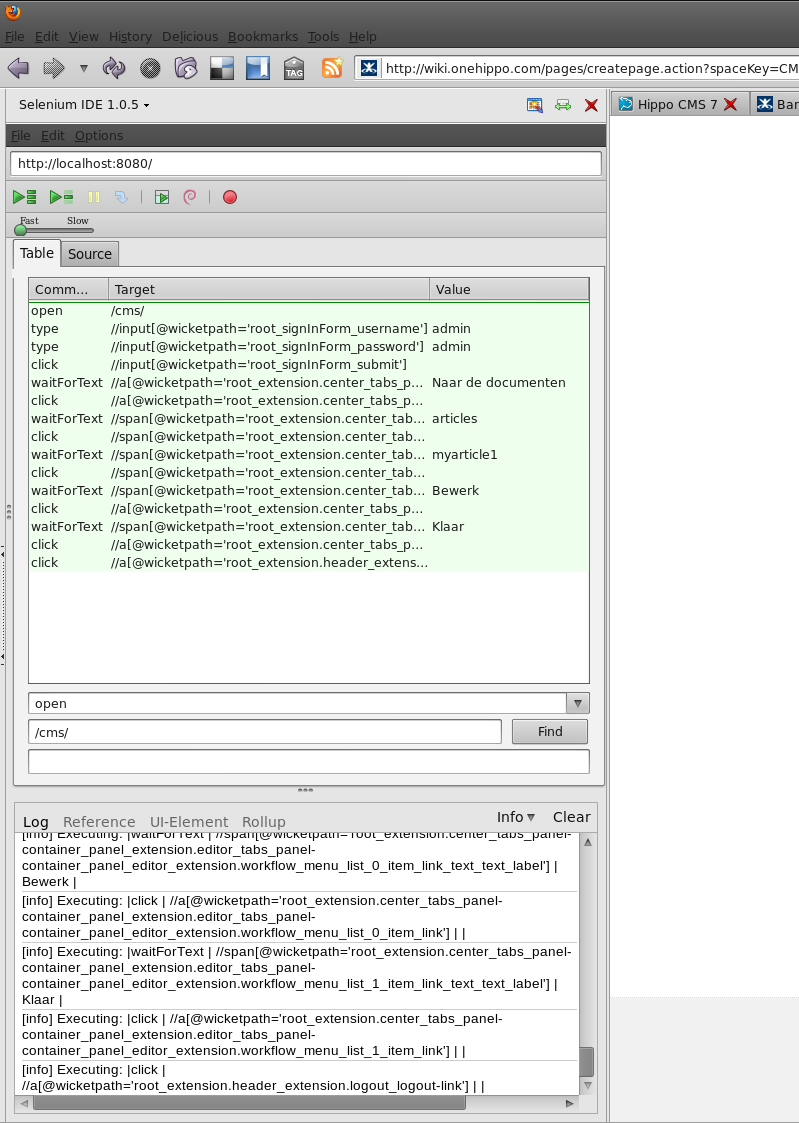
You can now record tests by interacting with the UI—click elements or right-click to insert additional commands. For reliable execution, insert a waitForText command before a click command when needed.
The following screenshot shows an example of recorded commands in Selenium IDE for Bloomreach Content: