Switch Template Support
Overview
Switch template support allows you to configure multiple Freemarker template variants for a component. You can select a template variant in the component configuration within the Experience Manager.
When to Use Switch Templates
Switch template support is useful when you want to:
- Allow CMS users to change the Freemarker template for a component in real time using the Channel Editor.
- Configure different templates based on visitor profiles using Relevance.
- Run A/B tests on templates using Experiments to measure conversion rates.
Switch template support requires that you use Freemarker templates as web files.
Prerequisites
- Freemarker templates must be stored as web files.
- The component must use a web file template (e.g.,
webfile:/freemarker/hstdefault/newslist-main-newslist.ftl).
Implementation Steps
1. Organize Template Variants
To enable multiple template variants for a component, create a folder with the same name as the base template (without the .ftl extension). Place the variant templates in this folder alongside the base template file.
Example directory structure:
/repository-data: /webfiles: /src: /main: /resources: /site: /freemarker: /hstdefault: /newslist-main-newslist: /variant.ftl: /newslist-main-newslist.ftl:
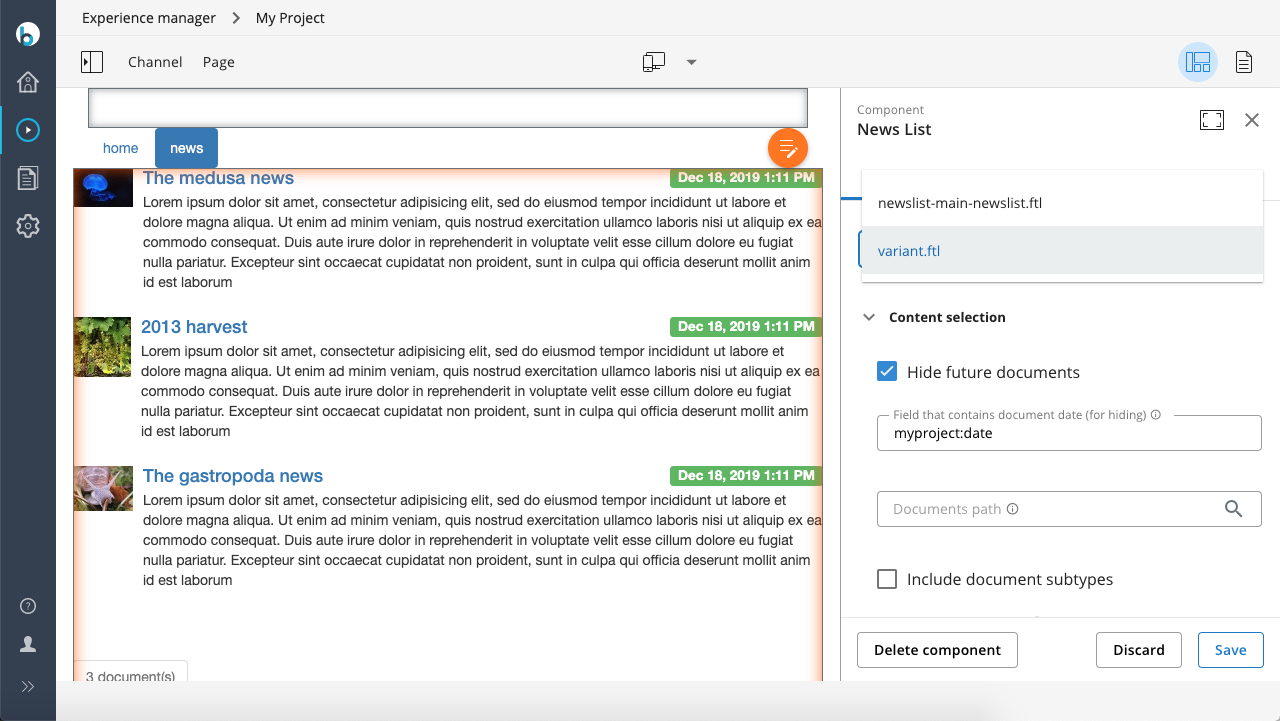
newslist-main-newslist.ftlis the default template.newslist-main-newslist/variant.ftlis an alternative template.
2. Configure the Component
Ensure your catalog component or container item references the base template:
webfile:/freemarker/hstdefault/newslist-main-newslist.ftl
When this structure is in place, the Channel Editor displays a dropdown in the component's properties panel. This dropdown lets users select between the base template and any variants.
3. Add Labels for Template Variants
By default, the dropdown displays the filenames of the template variants. To provide user-friendly labels, add a resource bundle file named after the template folder with a .properties extension.
Example directory structure:
/repository-data: /webfiles: /src: /main: /resources: /site: /freemarker: /hstdefault: /newslist-main-newslist: /variant.ftl: /newslist-main-newslist.ftl: /newslist-main-newslist.properties:
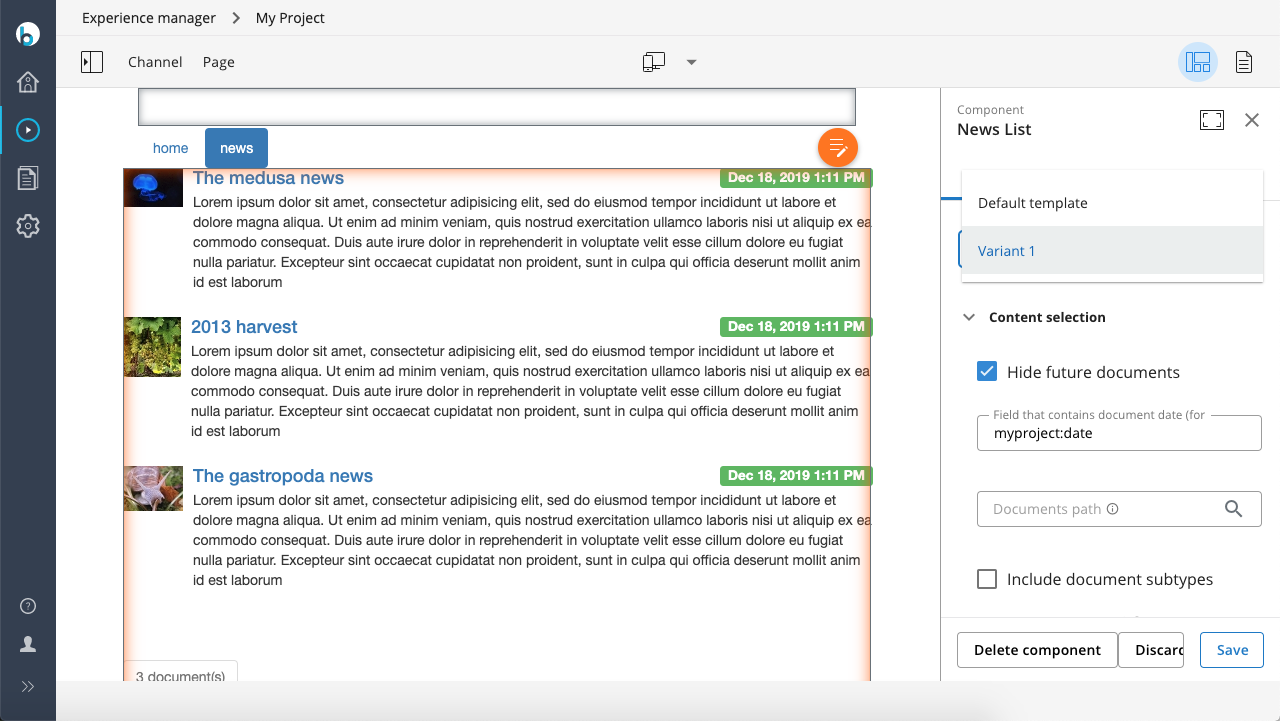
In newslist-main-newslist.properties, define keys for each template filename and set the desired display name as the value:
newslist-main-newslist.ftl = Default template
variant.ftl = Variant 1
With this configuration, the dropdown displays the specified labels instead of file names.
4. Localize Template Variant Labels
To provide localized labels, add additional properties files for each locale. For example, to localize for French (France), add:
newslist-main-newslist_fr.properties- or
newslist-main-newslist_fr_FR.properties
Each file should contain the localized display names for the template variants.
Verification
- Open the Channel Editor.
- Edit the component that references the base template.
- Confirm that the dropdown appears and displays the correct template variants and labels.
- Select a variant and verify that the component renders using the selected template.