Release Strategies for Content and Configuration Updates
When you release a new version of your project, you can bootstrap configuration and content into the repository. However, most repositories already contain existing configuration and content, either created by users or from previous releases. This can cause conflicts between new and existing configuration or content, especially for HST and application-specific configuration, which often change in live environments.
Several strategies are available for managing configuration changes. Before reviewing these strategies, it is important to understand how code and configuration move through the DTAP environments.
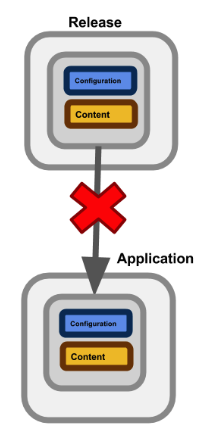
Diagram: Two stacked environment boxes are connected by a downward arrow. Each environment contains a "Configuration" block above a "Content" block. A red X overlays the connection, indicating that direct flow or promotion between environments is not allowed.
Audience
This information is relevant for:
- Release managers
- Developers
- Testers
- Functional administrators
- System administrators
For related information, see Deploying content and configuration updates.
Code Flow
Development of new content types and website components occurs in a staged environment, separate from production. This setup is known as the DTAP model: Development, Testing, Acceptance, and Production. Code moves in a single direction through these stages, from development to production. This is referred to as the code flow.
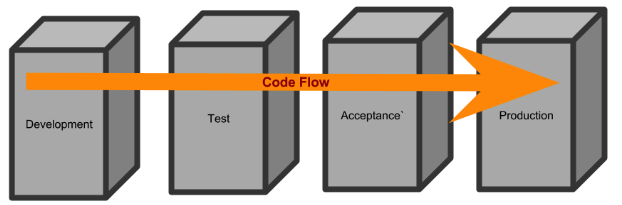
Diagram: Four boxes labeled Development, Test, Acceptance, and Production are arranged left to right. A thick orange arrow labeled "Code Flow" moves horizontally toward Production, showing code progressing sequentially through the DTAP stages.
Configuration Flow
Configuration can include both environment-specific settings and configuration tied to the code flow. When you bootstrap new configuration into the CMS, it follows the code flow. However, configuration can also move in the opposite direction (PATD). The following sections provide more detail on deployments and data movement.
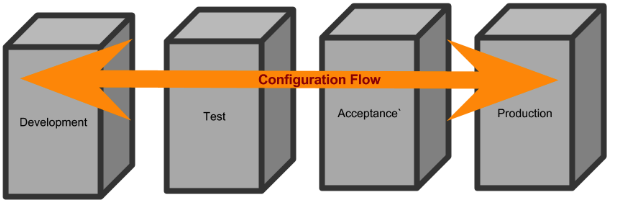
Diagram: Four environment blocks—Development, Test, Acceptance, and Production—are shown from left to right. A large orange double-headed arrow labeled "Configuration Flow" runs across all environments, indicating that configuration can move in both directions through the DTAP chain.
The table below summarizes how code, content, and configuration can move between DTAP environments:
| DTAP | PATD | |
|---|---|---|
| Content | No | Yes |
| Code | Yes | No |
| Configuration | ||
| HST | Yes | Yes |
| Application | Yes | No |
| Backend | Yes | No |
Overwrite Configuration
One strategy is to bootstrap all configuration from the release and overwrite existing configuration. To use this approach, you must first transfer configuration from production back to development. Merge the production and development configurations in the development environment. Then, deploy the merged configuration to production along with the code.
For technical details, see:
Channel Freeze
This process requires a channel freeze to prevent configuration changes during deployment. The main benefit of this strategy is control: all configuration changes are included in the release. However, this approach has significant drawbacks. Editors and testers cannot make changes in Channel Manager during the period when changes are being promoted through the DTAP environments. You must schedule a channel freeze, during which end users cannot modify configuration in Channel Manager. This method is suitable when editors and testers do not use Channel Manager or do not need to make configuration changes. Developers retain full control over the release process.
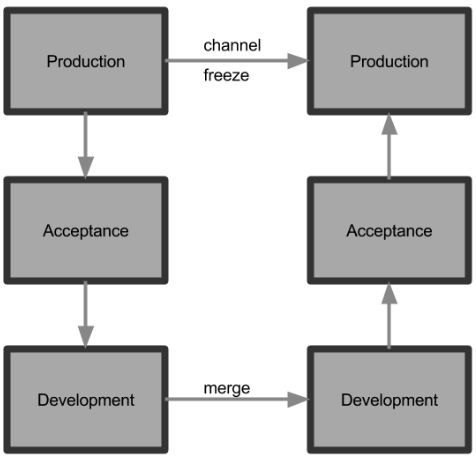
Diagram: Two vertical stacks of environments labeled Production, Acceptance, and Development are shown. Arrows indicate movement down from Production to Development on one side, and up from Development to Production on the other. A horizontal arrow labeled "channel freeze" connects the two Production boxes, illustrating the need for a channel freeze during the release process.
Update Configuration
A hybrid approach is to use Groovy scripts to merge new configuration with existing configuration. You can also use this method to upgrade content. Groovy scripts can be bootstrapped during deployment or executed from the CMS editor UI. Configuration tied to the code flow is merged with the existing configuration.
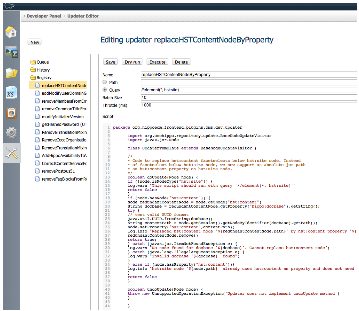
This approach provides flexibility and allows users to continue using Channel Manager and Template Editor until the release. However, you must test the target environment thoroughly. Editors should not make changes during the release (channel freeze). For technical details on upgrading HST configuration, see Update HST configuration.
How to Bootstrap Groovy Runners During Deployment
You can bootstrap Groovy runners during deployment in three ways:
- Manually start the scripts in the UI.
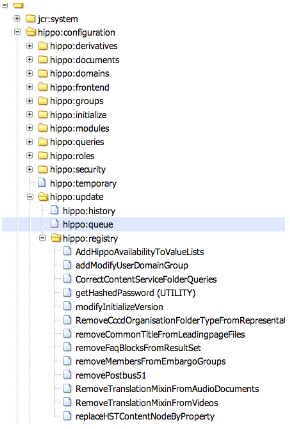
- Initialize the scripts in
/hippo:configuration/hippo:update/hippo:queue. Scripts in this queue run automatically during deployment. - If system administrators do not have CMS access, use an external application via RMI to bootstrap the Groovy scripts. The external application copies Groovy updaters from the registry into the queue for execution.
Manual Configuration
Another option is to apply configuration changes manually, following deployment instructions. Each release should include deployment notes with detailed steps for manual configuration in the CMS console.
Manual configuration is inherently error-prone. Minimize manual steps and use Groovy updaters where possible.
Copy to Target Environment
When deploying a release to a test or acceptance environment, copy the production database to the target environment. Both source and target environments must run the same release. First, copy the database from source to target (step 1). Then, deploy the new release into the target environment (step 2). After copying, perform any required adjustments in the acceptance environment, such as updating virtual host configuration or importing users and groups.
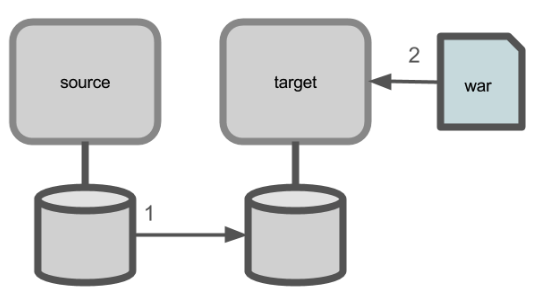
Diagram: Two environments labeled source and target, each with its own database. Step 1: an arrow copies data from the source database to the target database. Step 2: an arrow from a WAR file icon to the target environment indicates deployment of a new application release after the database copy.